5576b629d58cf.jpg)
Diamond-shaped Baubles made from Design Paper (the Paris Series)
#v13281
These diamond-shaped baubles are origami-folded from sheets of Vivi Gade Design paper (the Paris series) cut in half. A piece of mercerised cotton yarn is used for hanging.
Cómo hacerlo Descarga nuestras guías paso a paso
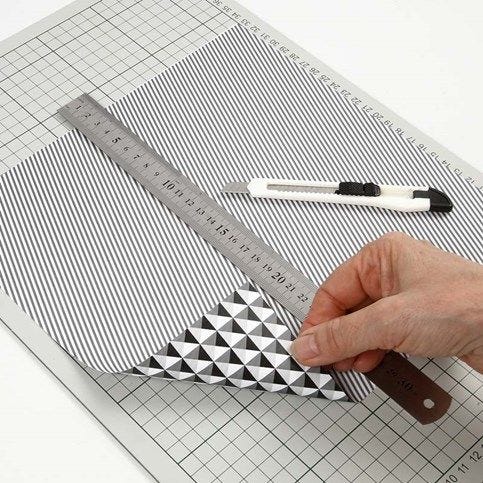
1. Cut a sheet of design paper in half; this is now a rectangular piece of paper. Note that the paper has a unique design on each side, so one sheet of design paper gives you two different looks.
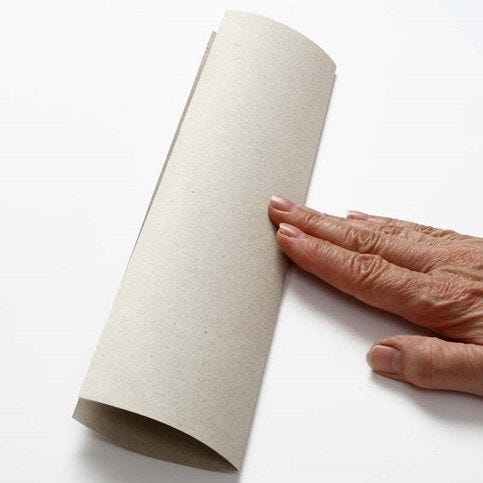
2. NB: Each step of the origami folding process is shown using plain paper, making each pleat and fold more visible. The first fold is made lengthwise. Un-fold.
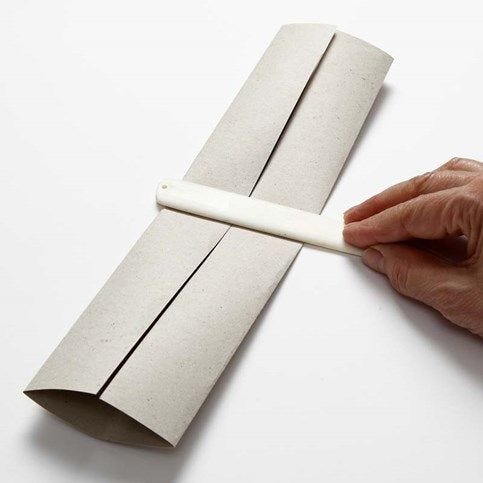
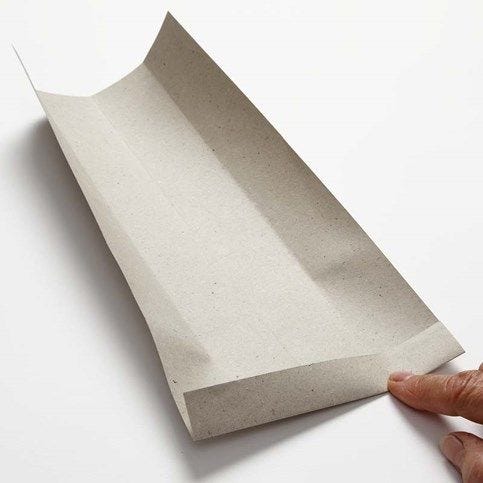
3. Fold each side of the paper towards the fold in the middle, making a “door”. You may use a bone folder to make sharp folds.
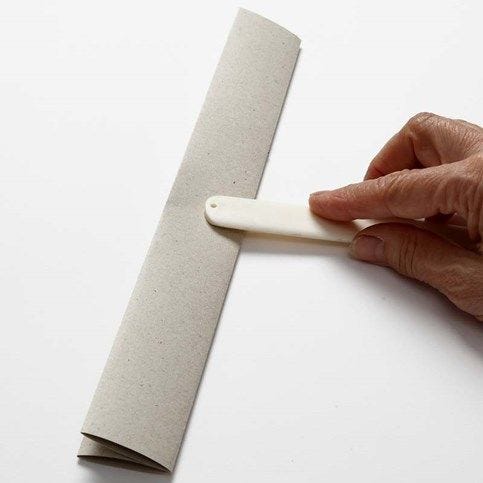
4. Now fold the “door”.
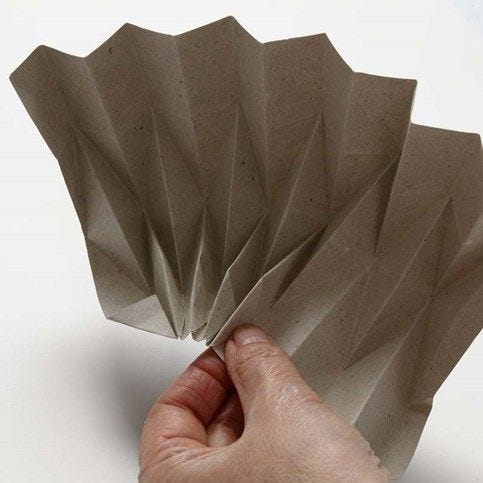
5. Pleating: Un-fold the paper completely and make a 2cm fold inwards across at one end of the rectangular piece of paper. NB: We have here chosen to make diamond shaped baubles with pleats with a 2cm gap, but it can be varied according to taste and ability – larger or smaller as you prefer. The smaller the gaps between each pleat, the more difficult the folding.
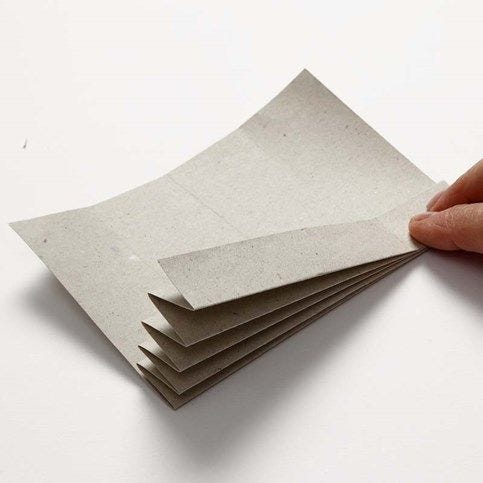
6. Continue the pleating/concertina folding carefully and precisely along the length of the paper.
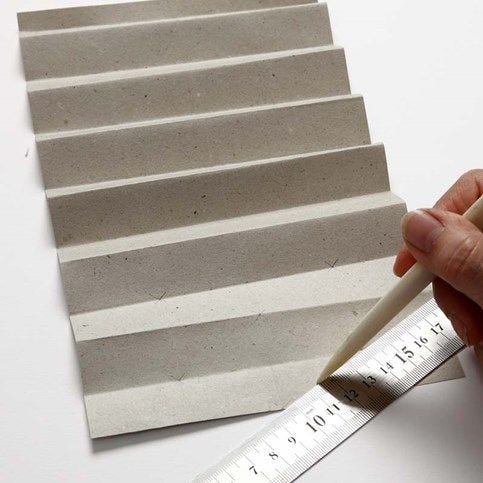
7. Fold the diamonds as follows: Measure and use the bone folder to score the folds between the displayed points.
8. Make a rhombus over a fold; i.e. make a mirror-imaged triangle on each side of the fold line.
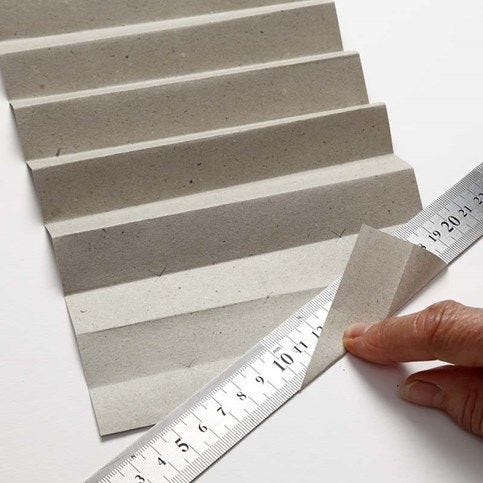
9. Use a ruler and only make the folds between the displayed points.
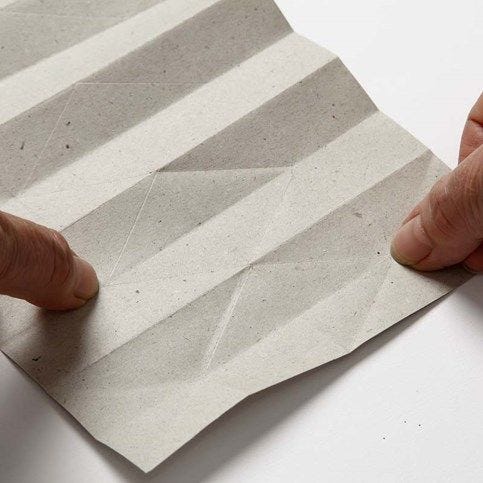
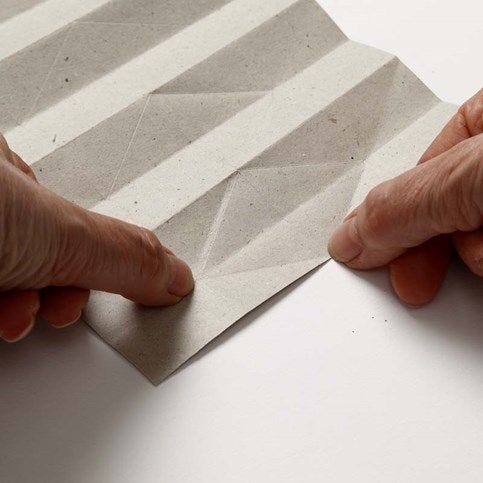
10. Score the entire pleats and folds as shown.
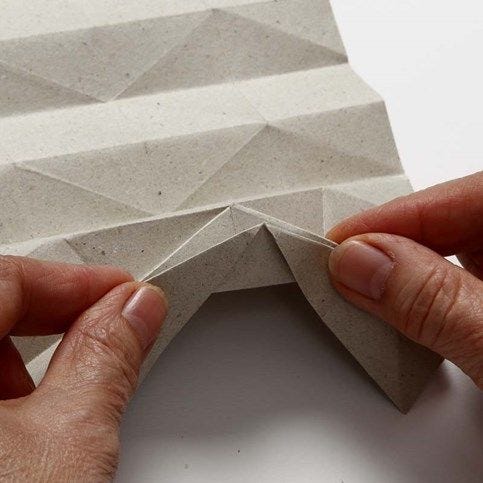
11. Use both hands to control the process when folding as shown from the center of the pleats/pleating.
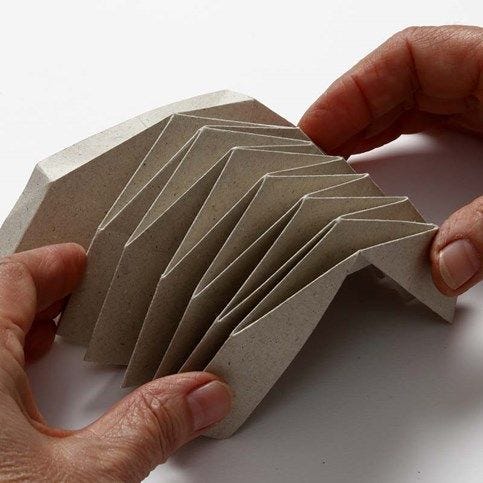
12. This is what it looks like when folded!
13. Turn the other side upwards and fold each pleat. NB: The pleat furthest away should always be folded inwards towards the center.
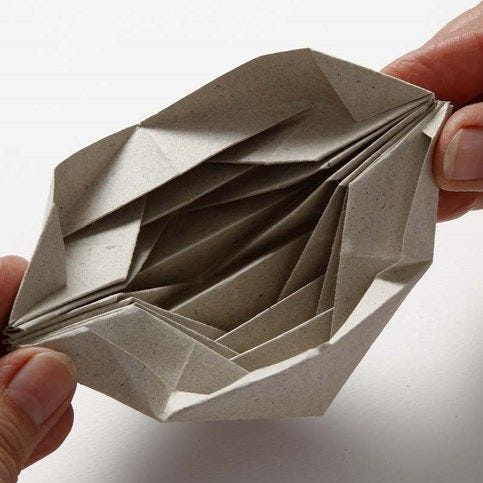
14. This example shows a partially assembled bauble.
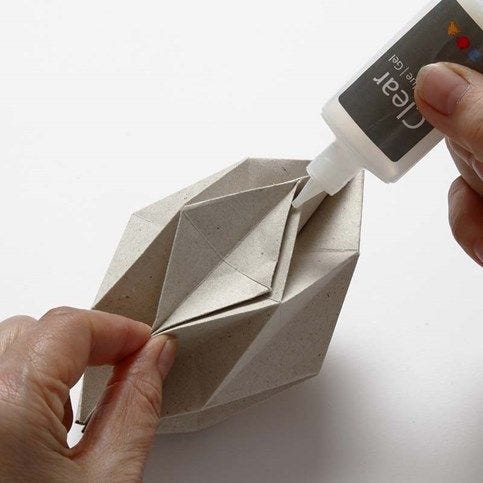
15. Use Clear Multi glue gel and glue together to form a bauble, following the origami folded pattern.
También vete a explorar