
Ideas creativas
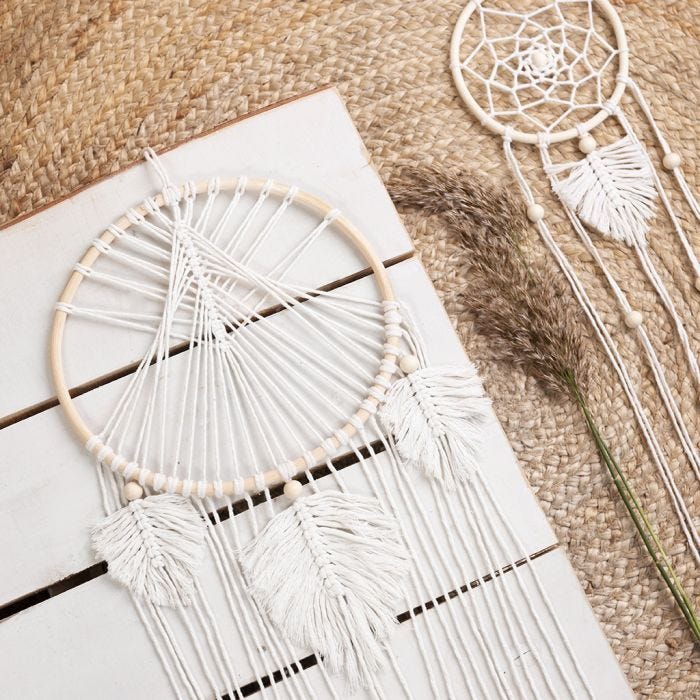
A homemade macramé dream catcher
#v15878
Make your own dream catchers by braiding different designs in different sizes using the macramé technique. Here we are showing two variants made using simple techniques.
#v15878
Cómo hacerlo
1 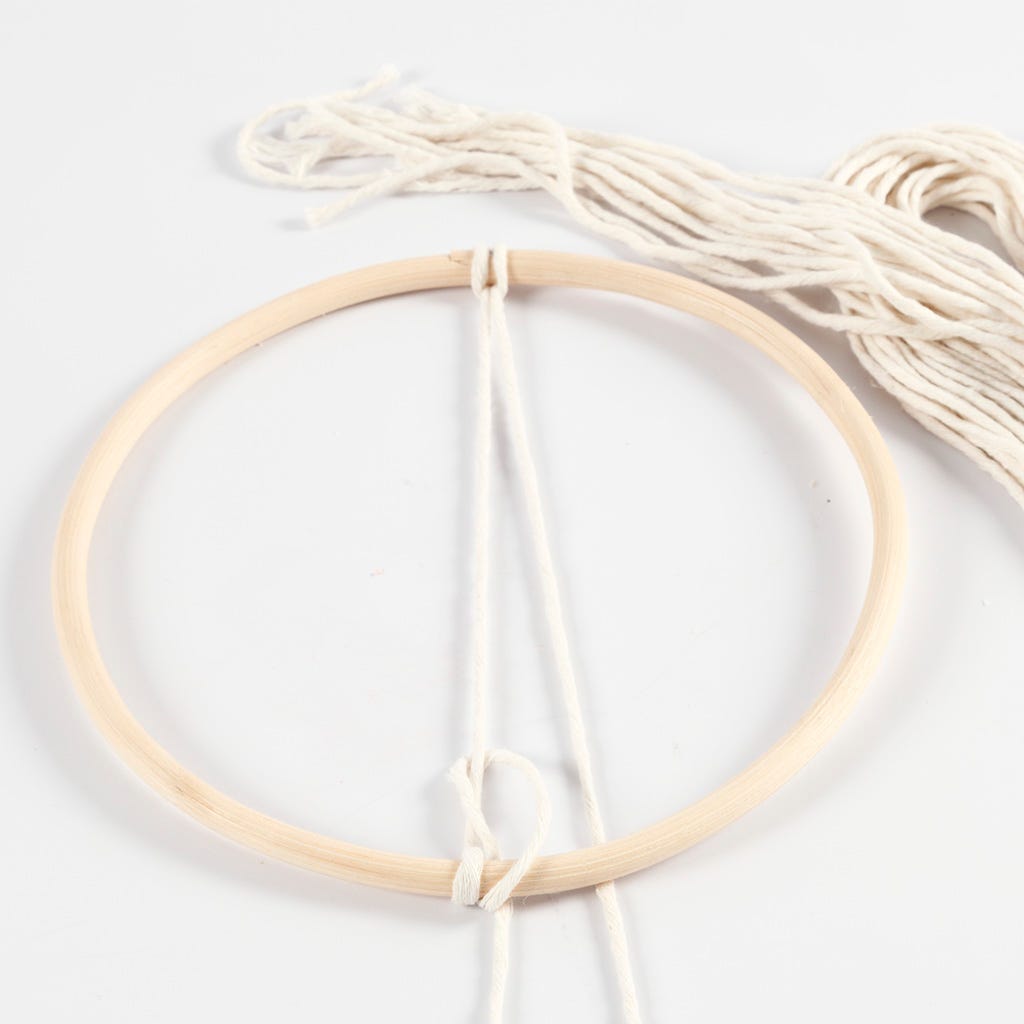 Make a dream catcher with a stringent design by cutting 13 x 3 m pieces of cotton twine for a 25 cm diameter ring or cut 13 x 2 m pieces of cotton twine for a 20 cm diameter ring. Tie a doubled-over piece of cotton twine onto the ring and secure it at the opposite side by twisting each cord around the ring and then tying a knot as shown in the photo. You will braid around this doubled over cord.
Make a dream catcher with a stringent design by cutting 13 x 3 m pieces of cotton twine for a 25 cm diameter ring or cut 13 x 2 m pieces of cotton twine for a 20 cm diameter ring. Tie a doubled-over piece of cotton twine onto the ring and secure it at the opposite side by twisting each cord around the ring and then tying a knot as shown in the photo. You will braid around this doubled over cord.2 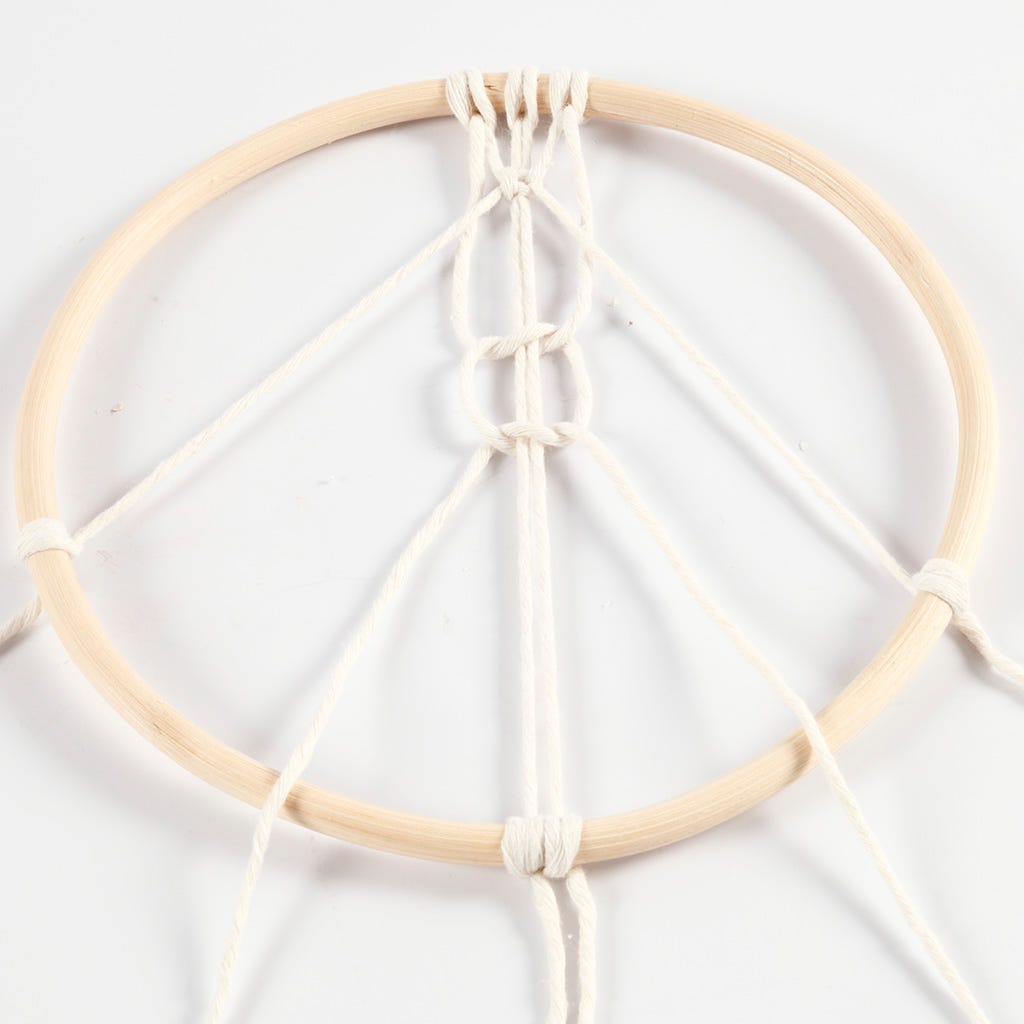 Tie the doubled-over cords onto the top of the ring and feed the ends behind the previous cords. Tie a double knot with a cord from each side. Pull the cords downwards at an angle and tie them onto the sides of the ring as shown in the photo.
Tie the doubled-over cords onto the top of the ring and feed the ends behind the previous cords. Tie a double knot with a cord from each side. Pull the cords downwards at an angle and tie them onto the sides of the ring as shown in the photo.3 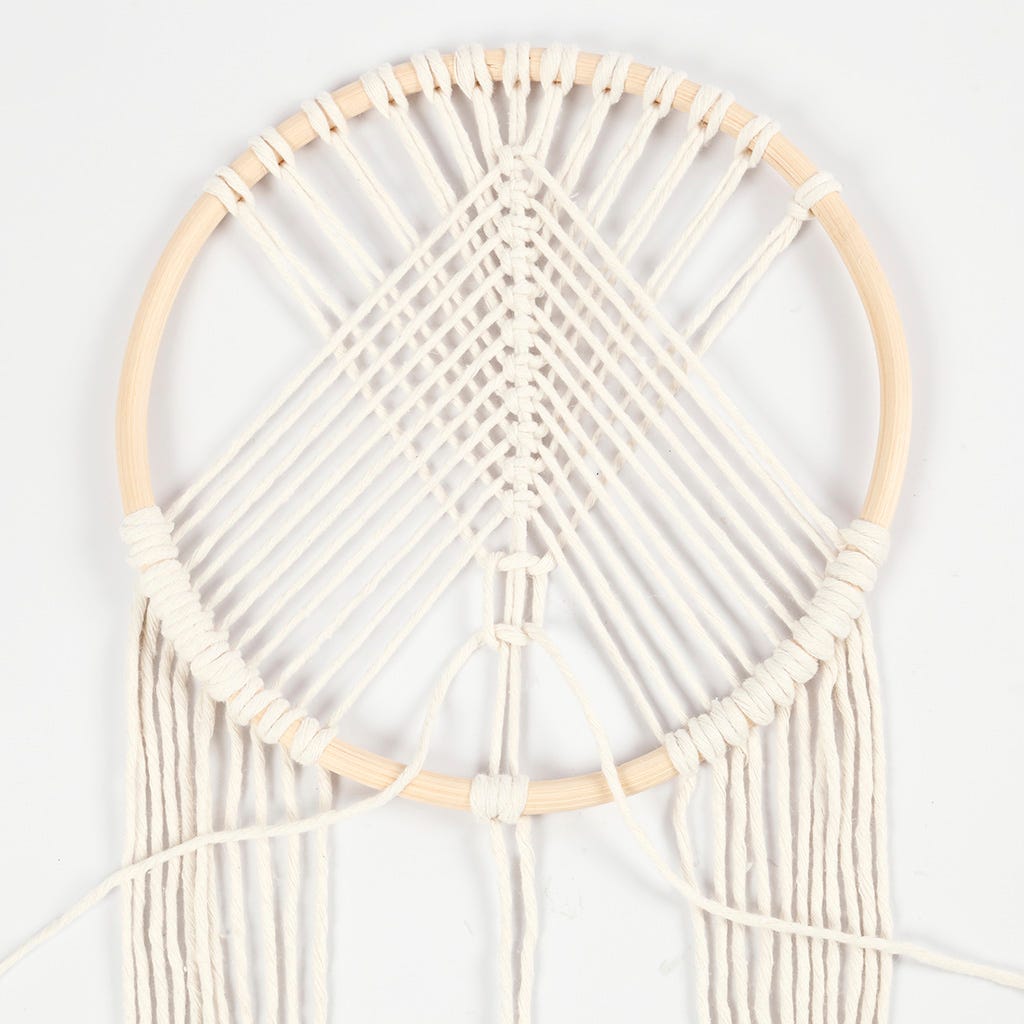 Continue with all the 12 pieces of cotton twine so that there are 6 cords on each side of the doubled-over twine in the middle. Tie a double knot with the cords that cross behind the previous cords and then tie the ends onto the side of the ring right underneath each other as shown in the photo.
Continue with all the 12 pieces of cotton twine so that there are 6 cords on each side of the doubled-over twine in the middle. Tie a double knot with the cords that cross behind the previous cords and then tie the ends onto the side of the ring right underneath each other as shown in the photo.4 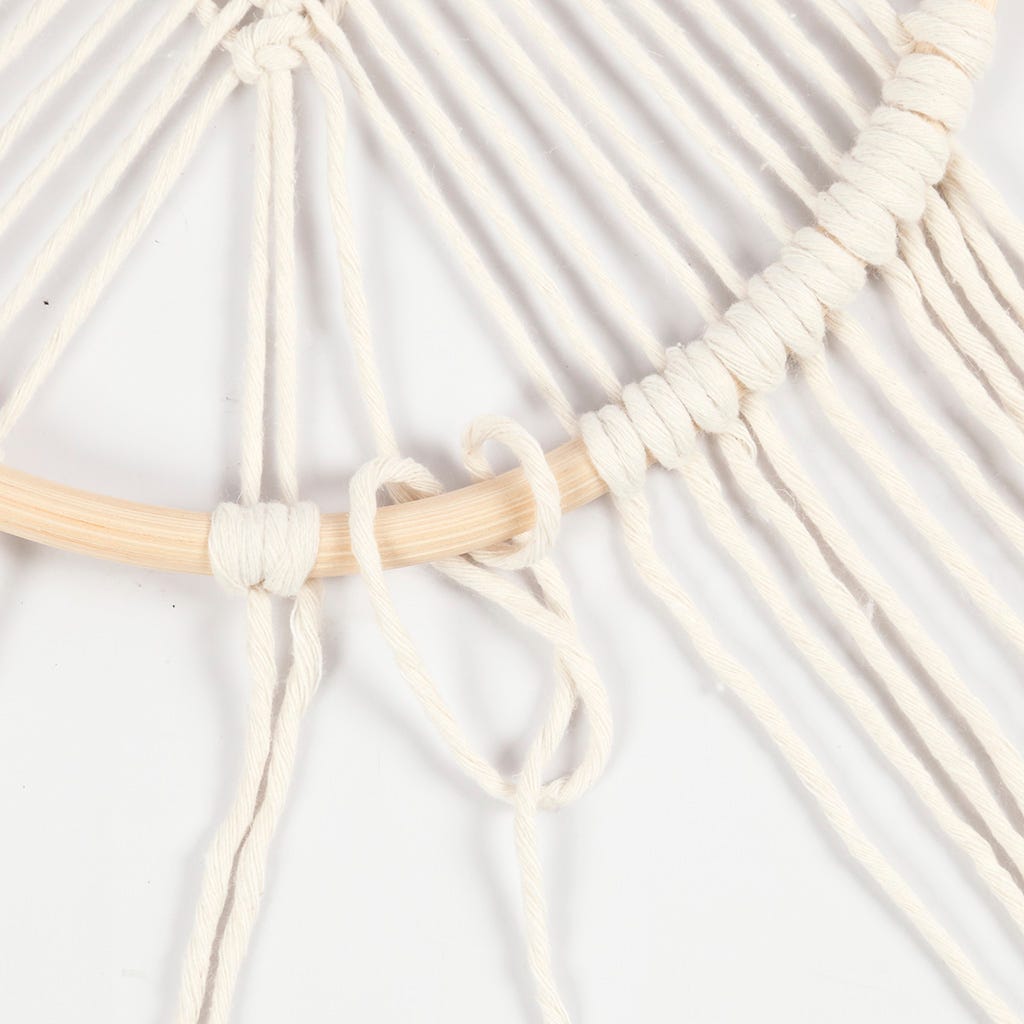 Secure the last cords straight down by twisting around the ring once and tying a knot. Adjust the knots so that the cords are spaced equally.
Secure the last cords straight down by twisting around the ring once and tying a knot. Adjust the knots so that the cords are spaced equally.5 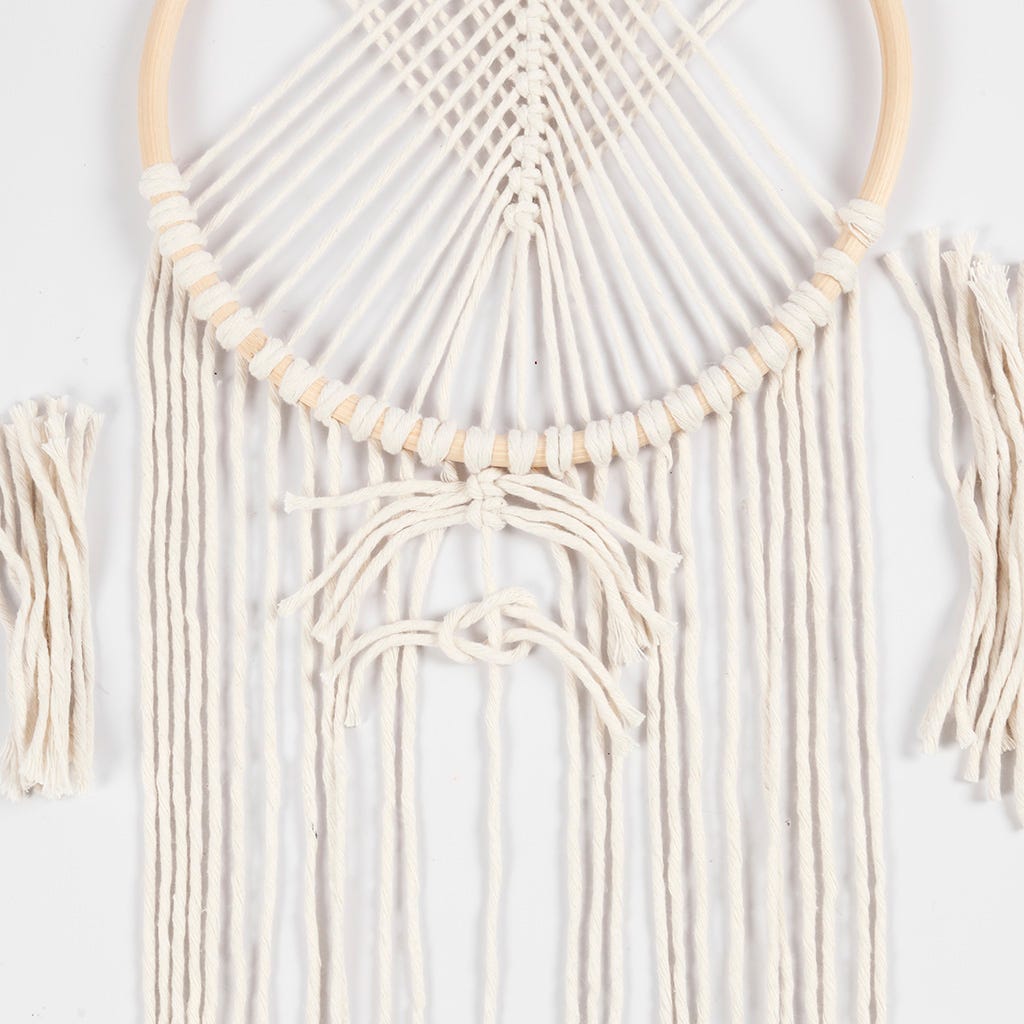 For the large leaf: Cut 20 x 14 cm pieces of cotton twine. Double them over and tie them onto one of the middle cords in pairs as shown in the photo. For each of the two small leaves cut 14 x 10 cm pieces of cotton twine and make leaves around the two outer cords following the same procedure.
For the large leaf: Cut 20 x 14 cm pieces of cotton twine. Double them over and tie them onto one of the middle cords in pairs as shown in the photo. For each of the two small leaves cut 14 x 10 cm pieces of cotton twine and make leaves around the two outer cords following the same procedure.6 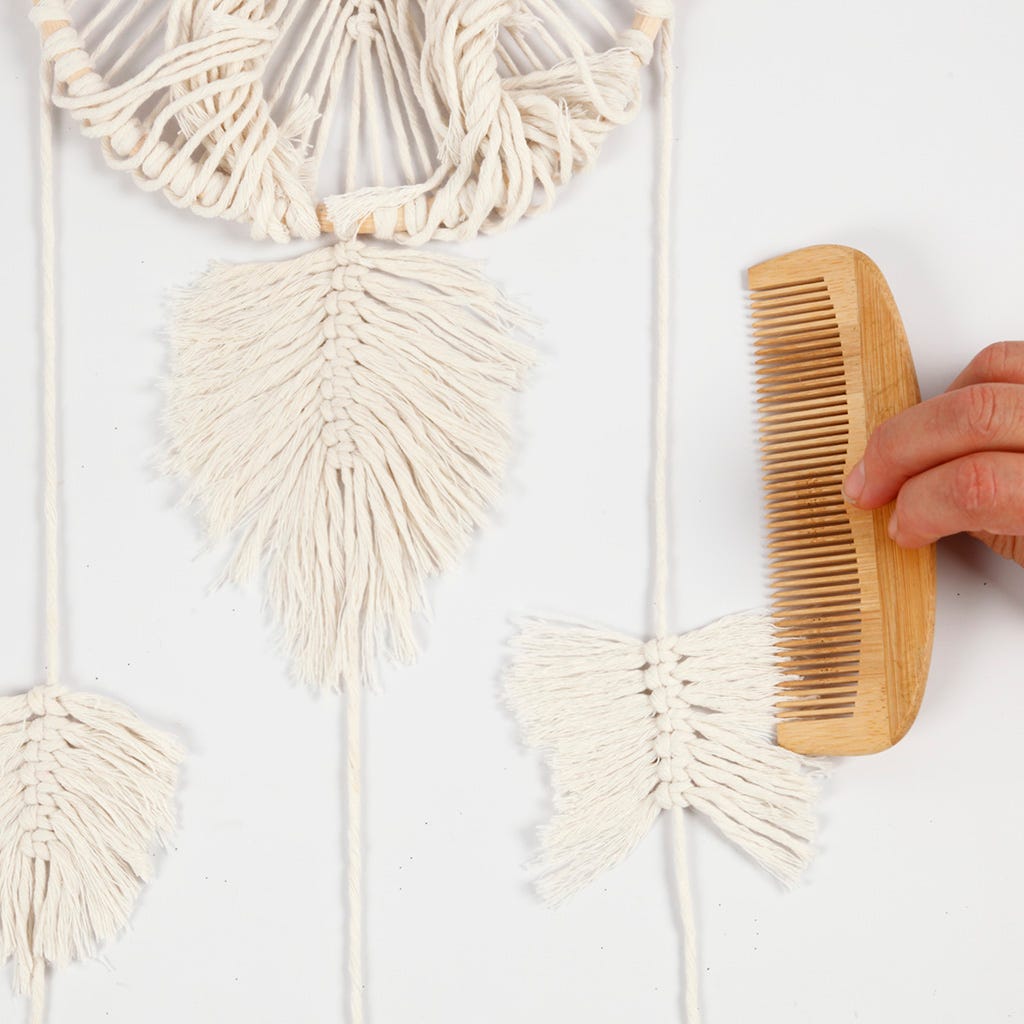 Unravel the cotton twine with a comb. Trim into a leaf shape using a pair of scissors. A tip: Make the cotton twine leaves wet and put them under pressure to get a beautiful shape.
Unravel the cotton twine with a comb. Trim into a leaf shape using a pair of scissors. A tip: Make the cotton twine leaves wet and put them under pressure to get a beautiful shape.7 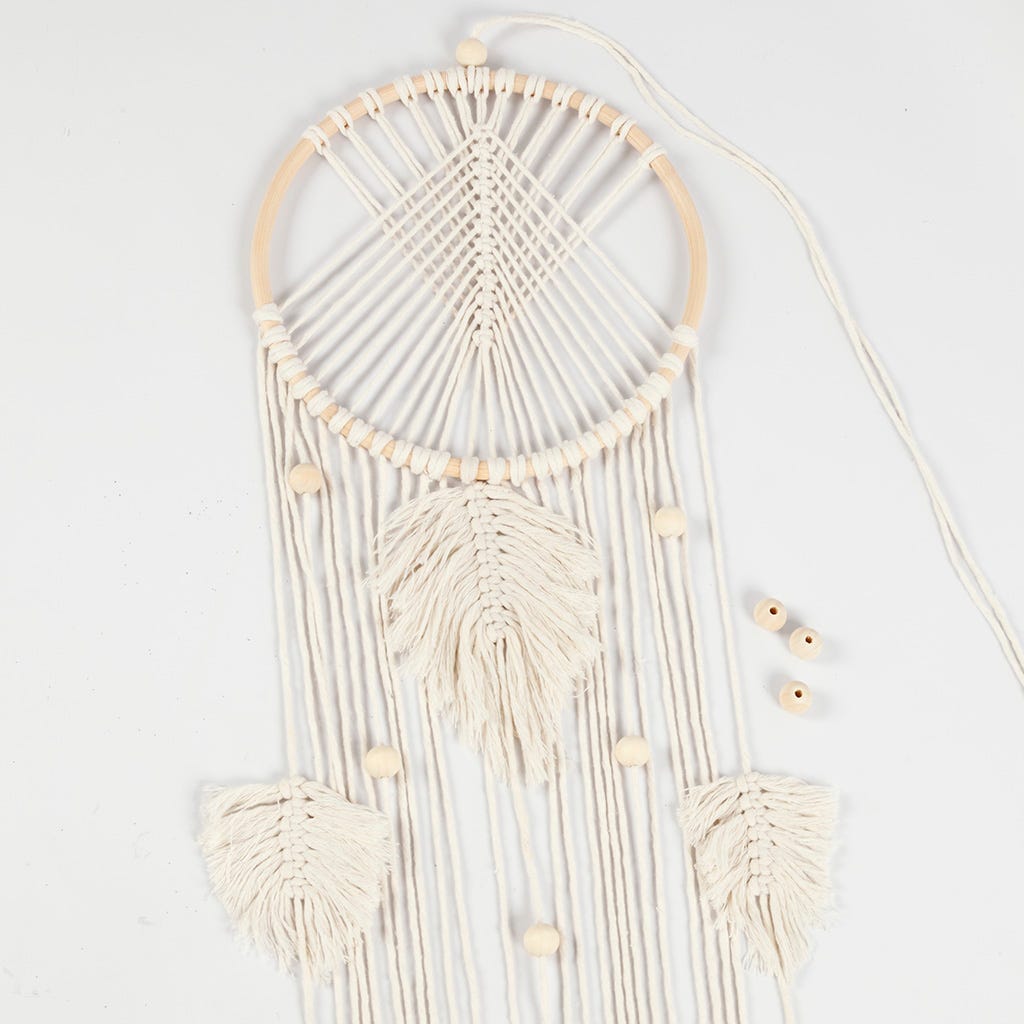 Thread wooden beads onto the long pieces of cotton twine which are hanging down from the dream catcher.
Thread wooden beads onto the long pieces of cotton twine which are hanging down from the dream catcher.8 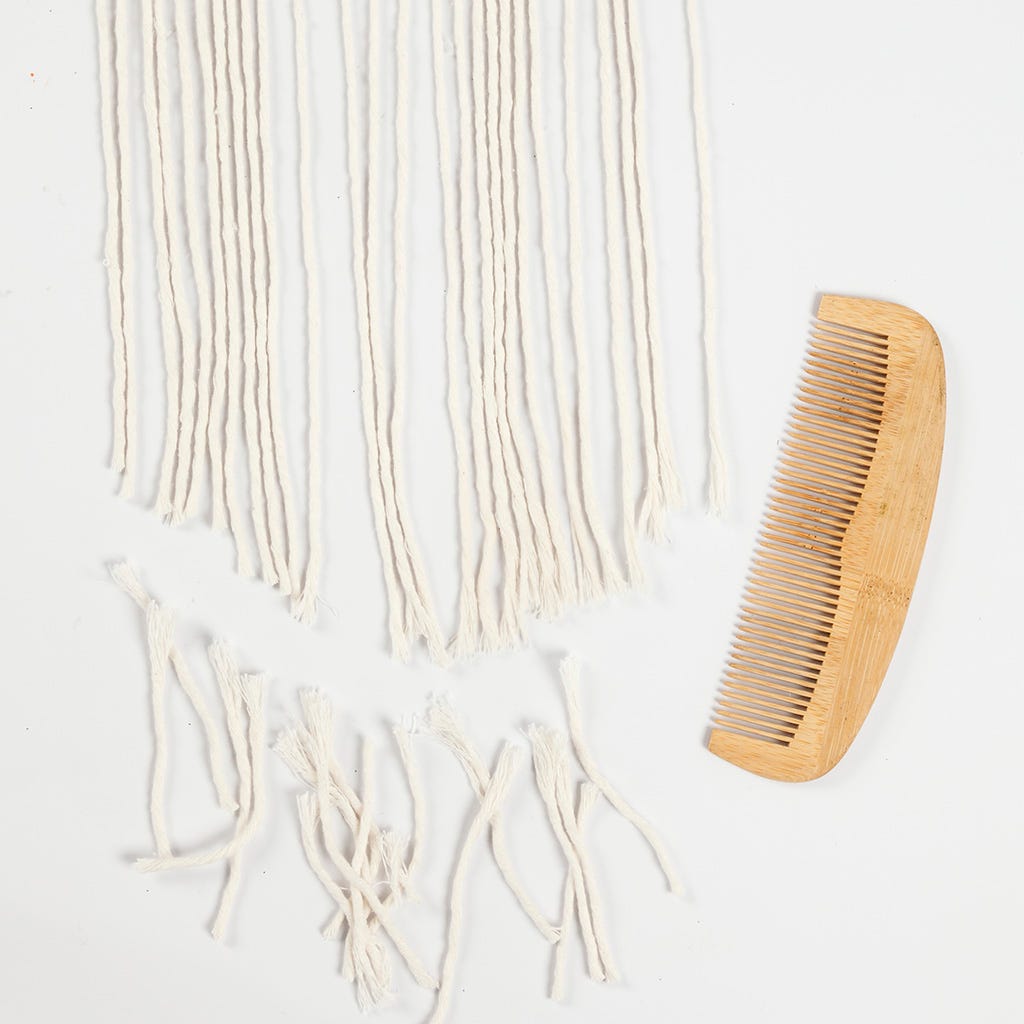 Trim the long pieces of cotton twine into a pointed shape at your chosen length. Unravel the lowest 5 cm with a comb.
Trim the long pieces of cotton twine into a pointed shape at your chosen length. Unravel the lowest 5 cm with a comb.9 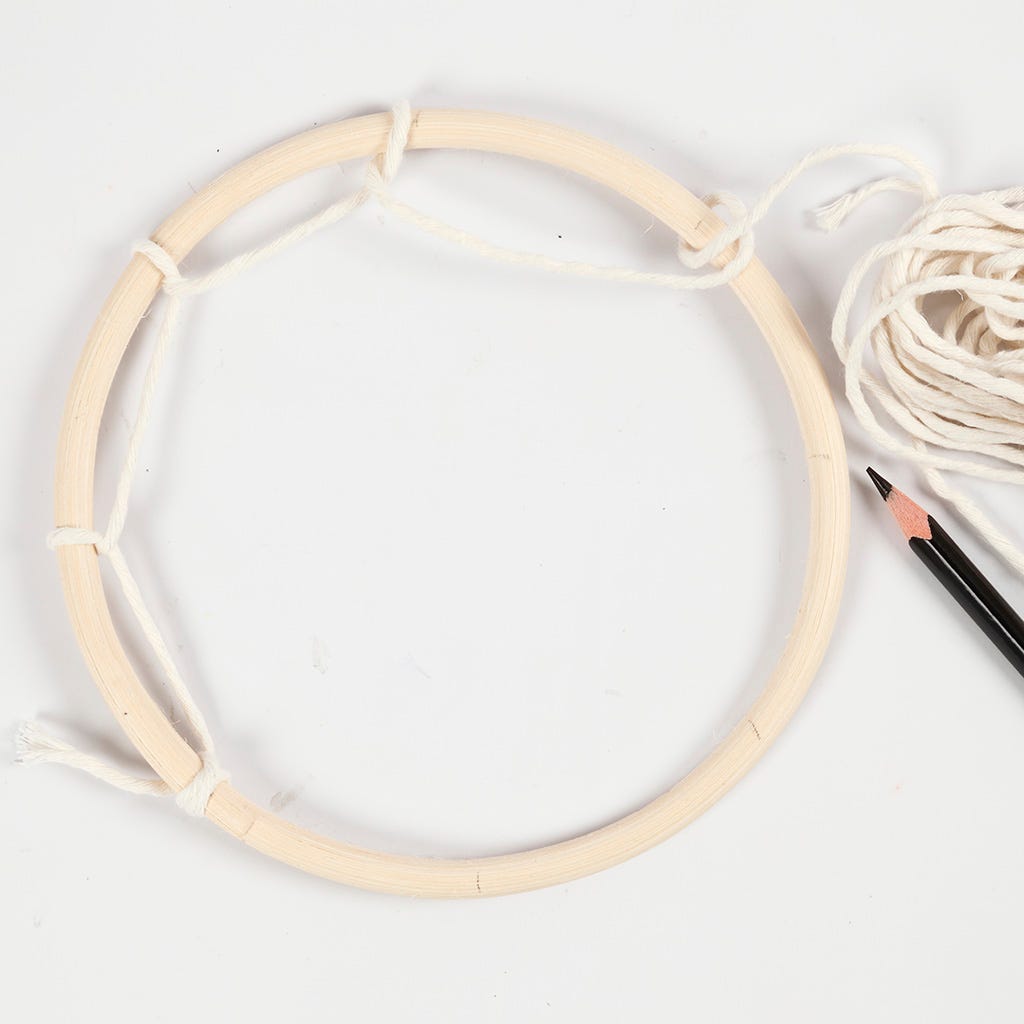 Make a dream catcher with a classic design by cutting a 1 x 2.5 m piece of cotton twine for a 15 cm diameter ring. Divide the ring into 8 sections, 5.5-6 cm long and mark each with a pencil. Tie the cotton twine onto one of the pencil marks and twist the twine around the ring. Cross in front of the twine before securing the twine onto the ring at the next pencil mark as shown in the photo.
Make a dream catcher with a classic design by cutting a 1 x 2.5 m piece of cotton twine for a 15 cm diameter ring. Divide the ring into 8 sections, 5.5-6 cm long and mark each with a pencil. Tie the cotton twine onto one of the pencil marks and twist the twine around the ring. Cross in front of the twine before securing the twine onto the ring at the next pencil mark as shown in the photo.10 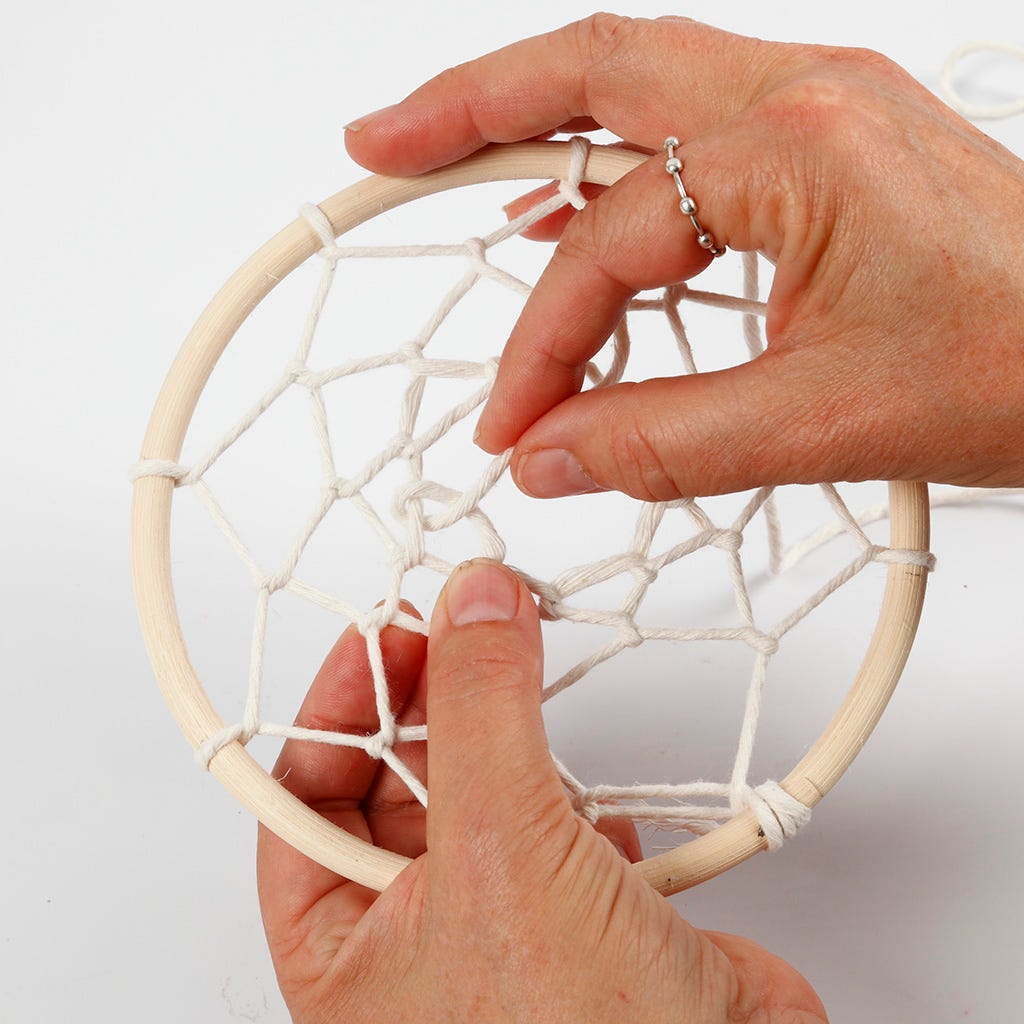 Continue wrapping the twine tightly around the middle of the next piece of cotton twine all the way around and cross in before the next round. Continue until the pattern reaches the middle of the ring. Tighten as you go along and hold onto the last knot with your index finger and thumb whilst making the next knot. Finish by making a knot on either side of a wooden bead. Apply a small blob of glue onto the very first knot and the last knot. Trim the twine closely.
Continue wrapping the twine tightly around the middle of the next piece of cotton twine all the way around and cross in before the next round. Continue until the pattern reaches the middle of the ring. Tighten as you go along and hold onto the last knot with your index finger and thumb whilst making the next knot. Finish by making a knot on either side of a wooden bead. Apply a small blob of glue onto the very first knot and the last knot. Trim the twine closely.11 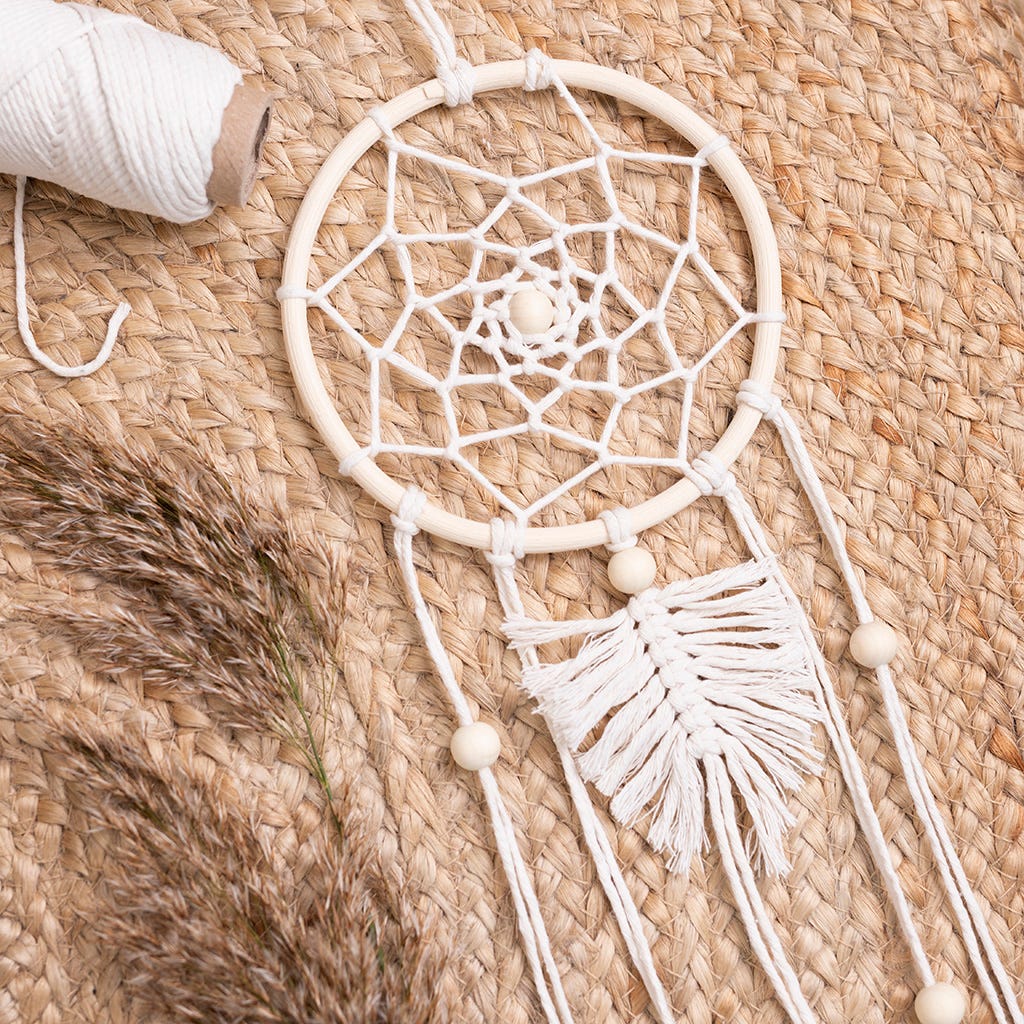 Here is a 15 cm diameter ring with a classic dream catcher pattern.
Here is a 15 cm diameter ring with a classic dream catcher pattern.También vete a explorar
