
225576b62c646f1.jpg)
Ideas creativas
A Vivi Gade Folding Box
#v1340
#v1340
Cómo hacerlo
1 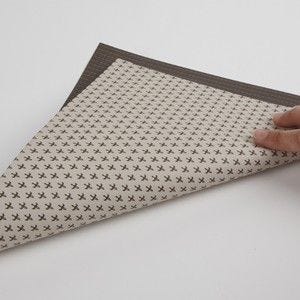 Fold a single piece of paper measuring 30.5 x 30.5cm diagonally to make triangle.
Fold a single piece of paper measuring 30.5 x 30.5cm diagonally to make triangle.2 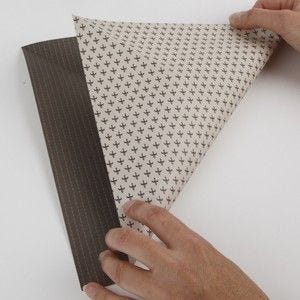 Unfold the paper and fold it the other way – you now have two folded creases.
Unfold the paper and fold it the other way – you now have two folded creases.3 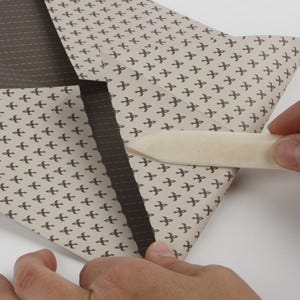 Open up and fold all four corners towards the middle.
Open up and fold all four corners towards the middle.4  Fold one side towards the middle as shown in the picture.
Fold one side towards the middle as shown in the picture.5  Repeat the procedure with the other side.
Repeat the procedure with the other side.6 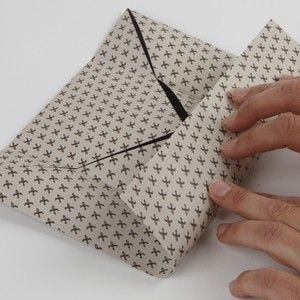 Open up and repeat the procedure with the remaining two sides.
Open up and repeat the procedure with the remaining two sides.7 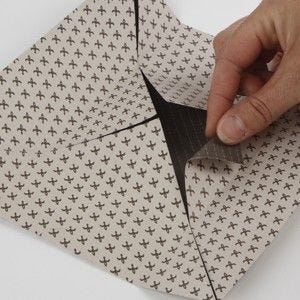 Open up and fold one of the four triangles towards the middle. The point of the triangle should meet in the middle.
Open up and fold one of the four triangles towards the middle. The point of the triangle should meet in the middle.8 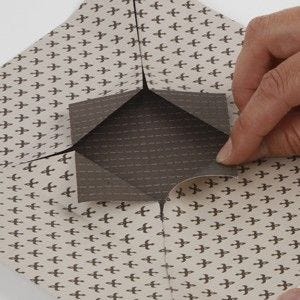 Repeat this procedure with the other three triangles.
Repeat this procedure with the other three triangles.9 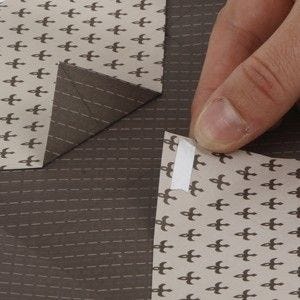 Apply double-sided adhesive tape on the back of two opposite triangles – do not yet remove the white protective layer of the tape.
Apply double-sided adhesive tape on the back of two opposite triangles – do not yet remove the white protective layer of the tape.10 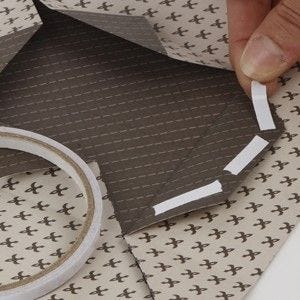 Open up two opposite flaps and attach double-sided adhesive tape on the back.
Open up two opposite flaps and attach double-sided adhesive tape on the back.11 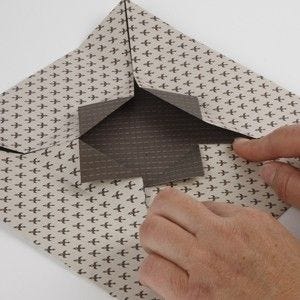 Push down the flaps with the double-sided adhesive tape into the base of the box.
Push down the flaps with the double-sided adhesive tape into the base of the box.12 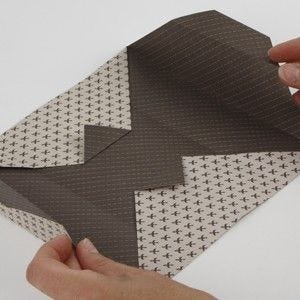 Fasten the two small triangles mentioned in stage 9.
Fasten the two small triangles mentioned in stage 9.13  Unfold the paper and fold the two long sides towards the centre of the paper.
Unfold the paper and fold the two long sides towards the centre of the paper.14 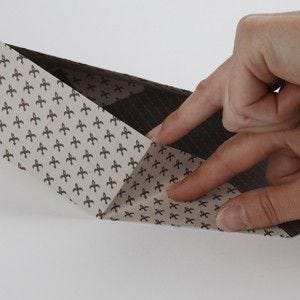 Fold the corners as shown in the picture.
Fold the corners as shown in the picture.15  Fold the corners as shown in the picture.
Fold the corners as shown in the picture.16 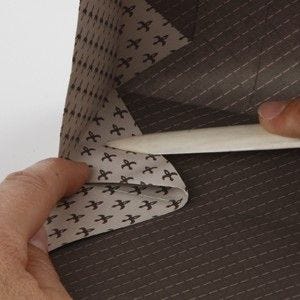 Repeat the procedure on the opposite side.
Repeat the procedure on the opposite side.17 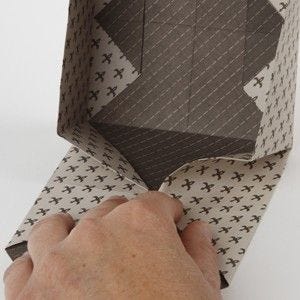 After folding
After folding18 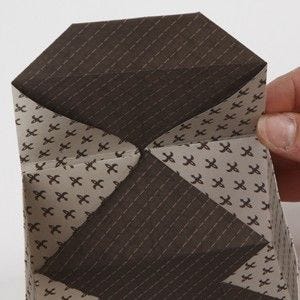 After folding
After folding19 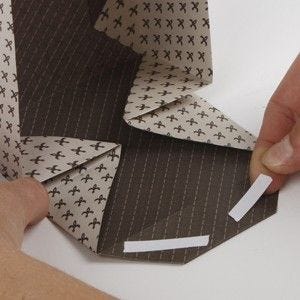 Add double-sided adhesive tape as shown in the picture.
Add double-sided adhesive tape as shown in the picture.20 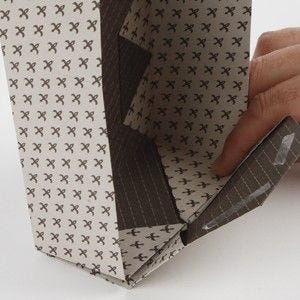 Fold the paper tightly.
Fold the paper tightly.21 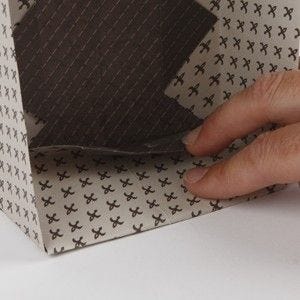 Press down so the bottom edges are flush with each other at the base of the box.
Press down so the bottom edges are flush with each other at the base of the box.22 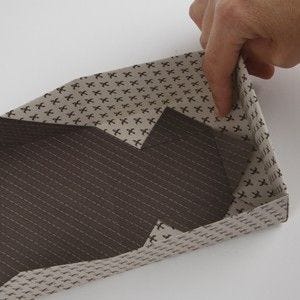 Repeat steps 14 – 22.
Repeat steps 14 – 22.23 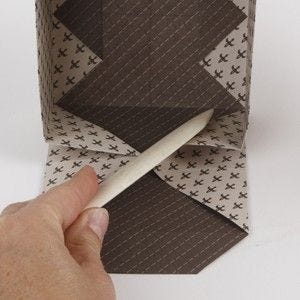 Repeat steps 14 – 22.
Repeat steps 14 – 22.24 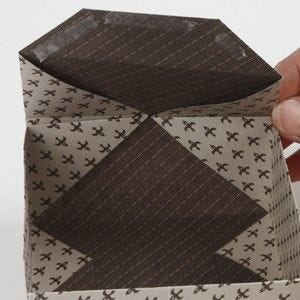 -
-
-25 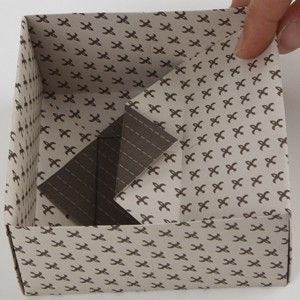 -
-
-26 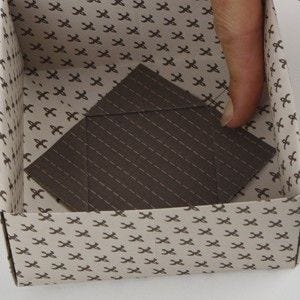 -
-
-27 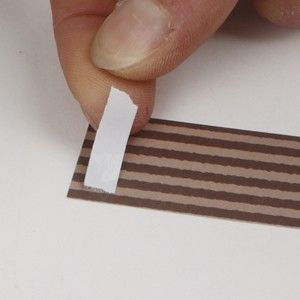 Cut two paper strips each measuring 2.5 x 30cm.
Cut two paper strips each measuring 2.5 x 30cm.28  Attach the paper strip using a piece of double-sided adhesive tape on the inside of the lid.
Attach the paper strip using a piece of double-sided adhesive tape on the inside of the lid.29 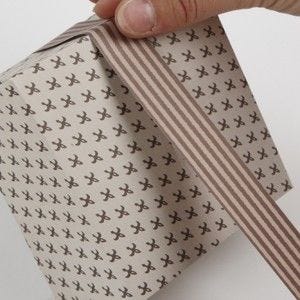 Fold the paper strip around the outside of the lid.
Fold the paper strip around the outside of the lid.30 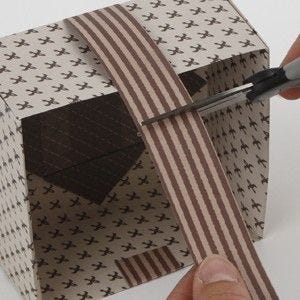 Cut off the excess strip.
Cut off the excess strip.31 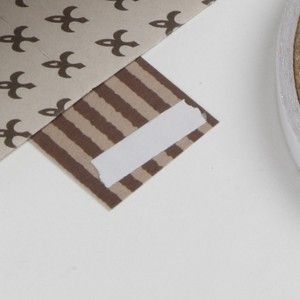 Attach a piece of double-sided adhesive tape to the end of the paper strip.
Attach a piece of double-sided adhesive tape to the end of the paper strip.32 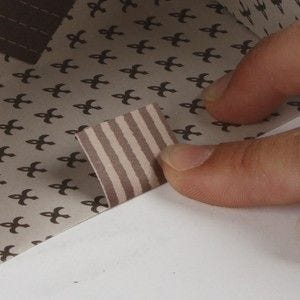 Tuck it inside the lid.
Tuck it inside the lid.33 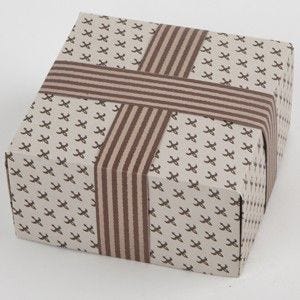 Repeat on the opposite side.
Repeat on the opposite side.34 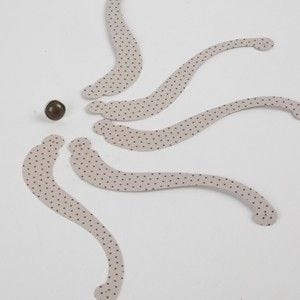 Take a metal brad and five Christmas paper strips or use a template to cut out the strips.
Take a metal brad and five Christmas paper strips or use a template to cut out the strips.35 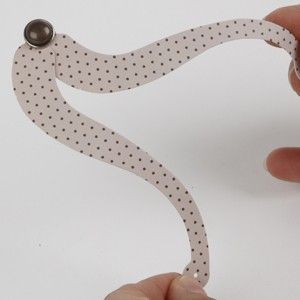 Assemble the rosette as shown in the pictures 36, 37 and 38.
Assemble the rosette as shown in the pictures 36, 37 and 38.36 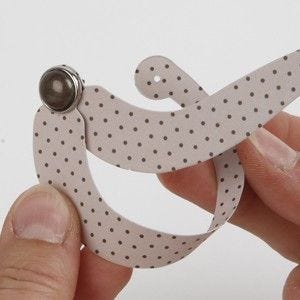 -
-
-37 22.jpg) -
-
-38 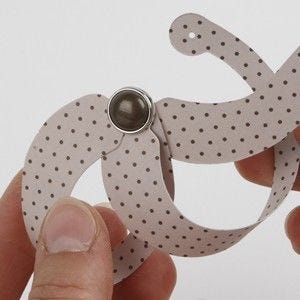 -
-
-39 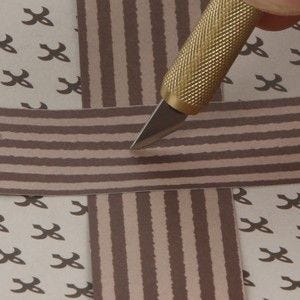 Cut a hole in the middle of the lid.
Cut a hole in the middle of the lid.40  Push the metal brad through the hole of the lid.
Push the metal brad through the hole of the lid.41 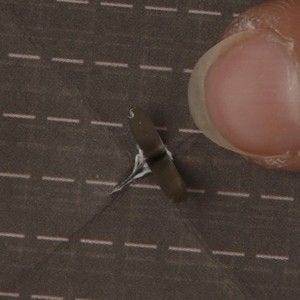 Separate the legs on the inside of the lid.
Separate the legs on the inside of the lid.42  The lid is now completed.
The lid is now completed.The base Use a piece of paper measuring 29.8 x 29.8cm for the base. Assemble as shown in pictures 1-26.
También vete a explorar
