
Ideas creativas
Helmets – Role Playing
#v11196
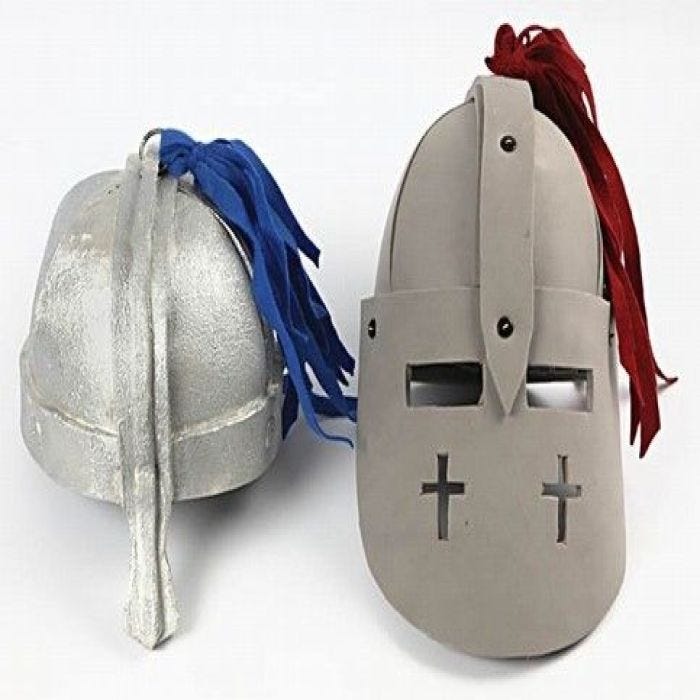
A beautiful knight’s helmet made from foam rubber sleeping mat material with cloth tape and double-sided adhesive tape, decorated with buttons and felt.
#v11196
Cómo hacerlo
Step 1. 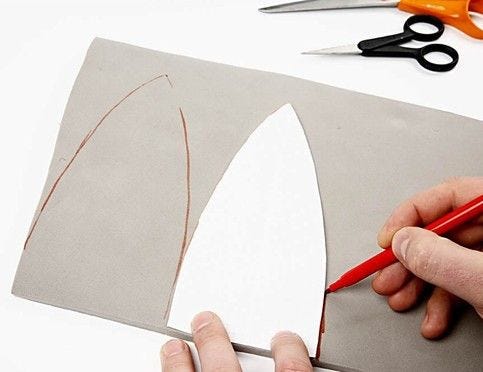 Print and cut out the pattern. Then draw the parts onto the foam rubber sleeping mat material.
Print and cut out the pattern. Then draw the parts onto the foam rubber sleeping mat material.Step 2. 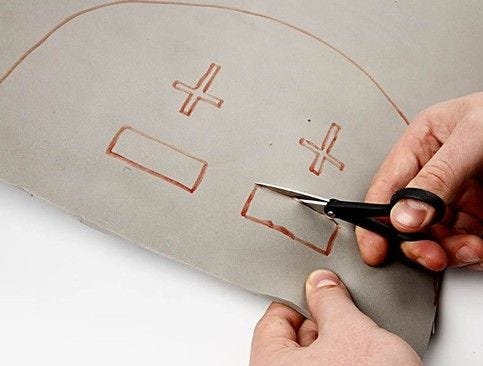 Cut out the parts.
Cut out the parts.Step 3. 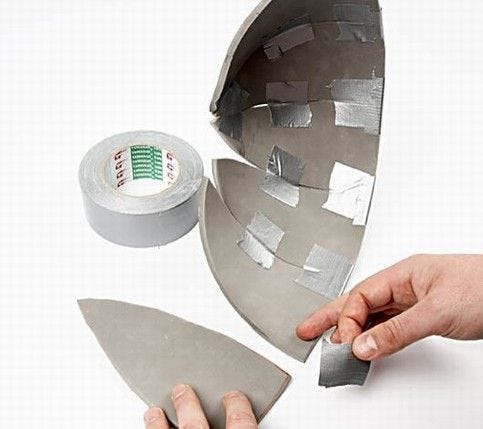 Put the triangles together with cloth tape as illustrated.
Put the triangles together with cloth tape as illustrated.Step 4. 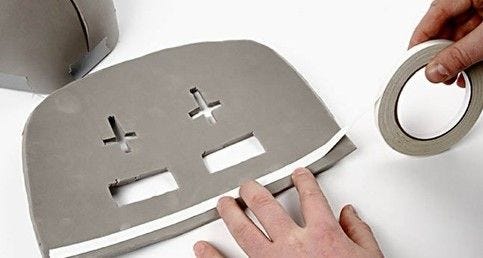 Use double-sided adhesive tape to attach the visor onto the helmet.
Use double-sided adhesive tape to attach the visor onto the helmet.Step 5. 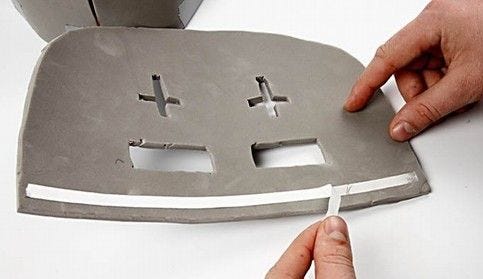 Also attach the strips using double-sided adhesive tape.
Also attach the strips using double-sided adhesive tape.Step 6. 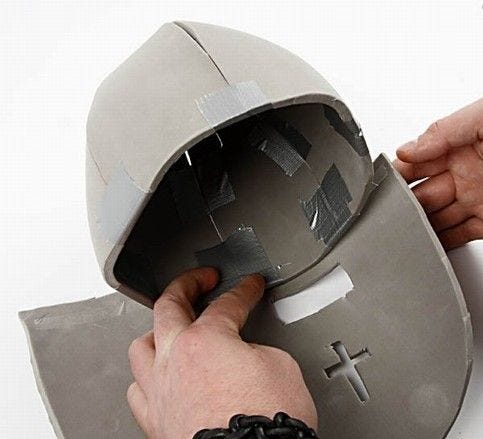 -
-
-Step 7.  -
-
-Step 8. 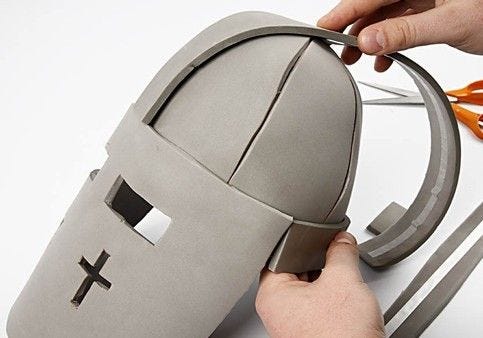 -
-
-Step 9. 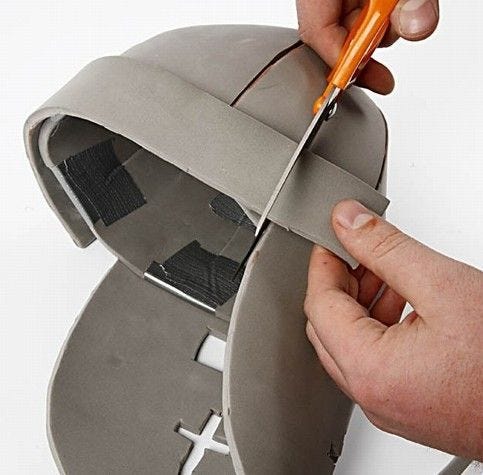 Cut off the excess at the ends.
Cut off the excess at the ends.Step 10. 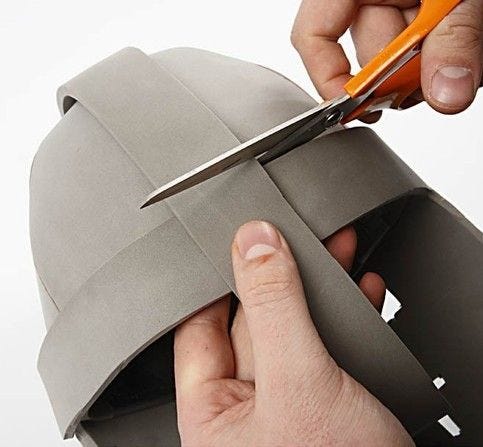 -
-
-Step 11. 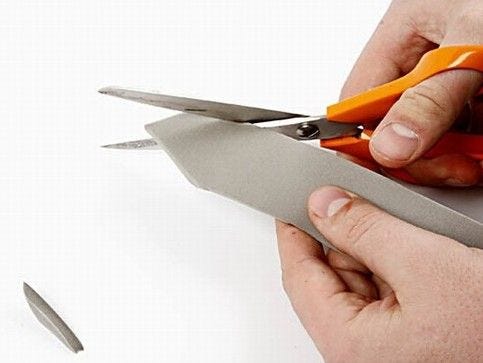 Take extra strips and cut them into points at the ends.
Take extra strips and cut them into points at the ends.Step 12. 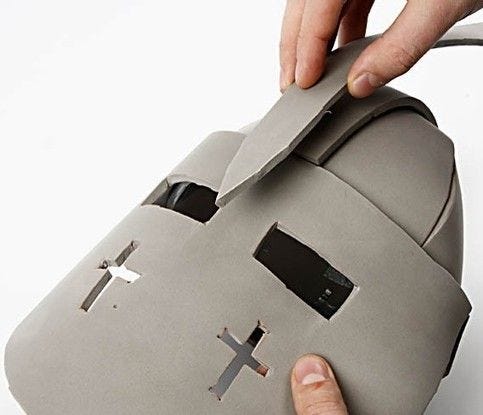 Attach the strip, starting on the visor as shown.
Attach the strip, starting on the visor as shown.Step 13. 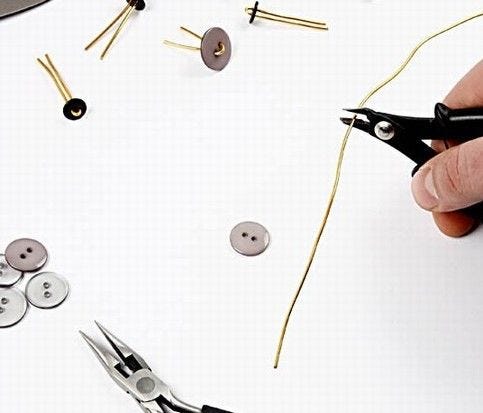 Make “brads” from buttons and bonsai wire as shown.
Make “brads” from buttons and bonsai wire as shown.Step 14. 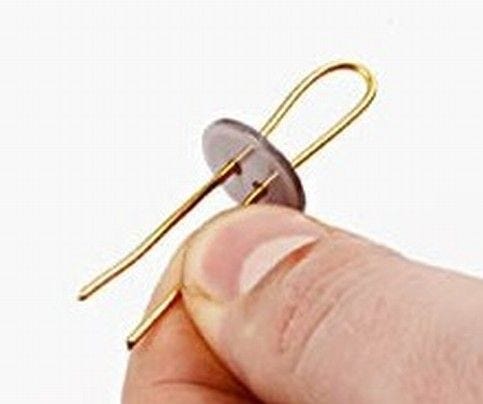 -
-
-Step 15. 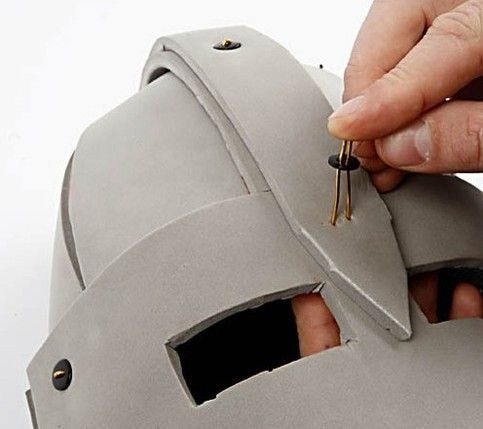 Fasten the “brads” onto the helmet by pushing them through the foam rubber.
Fasten the “brads” onto the helmet by pushing them through the foam rubber.Step 16.  Bend out the legs of the “brad” on the reverse and cover with a piece of cloth tape.
Bend out the legs of the “brad” on the reverse and cover with a piece of cloth tape.Step 17. 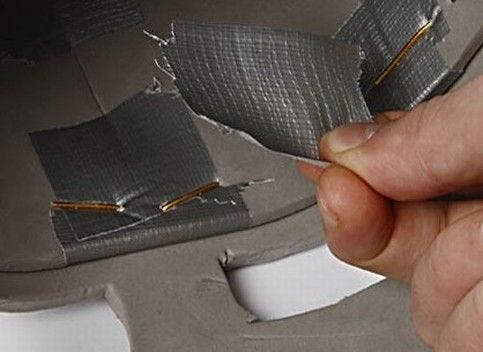 -
-
-Step 18. 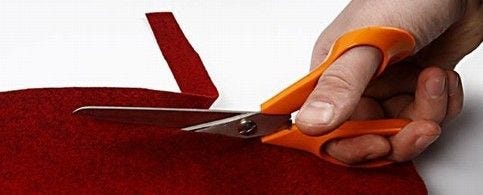 Cut 6-10 strips (each approx. 1 x 50cm) from textured acrylic felt for helmet adornment.
Cut 6-10 strips (each approx. 1 x 50cm) from textured acrylic felt for helmet adornment.Step 19. 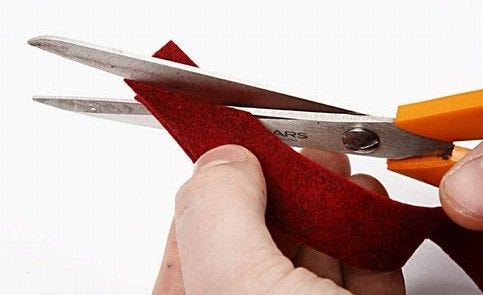 Cut the ends into a point.
Cut the ends into a point.Step 20. 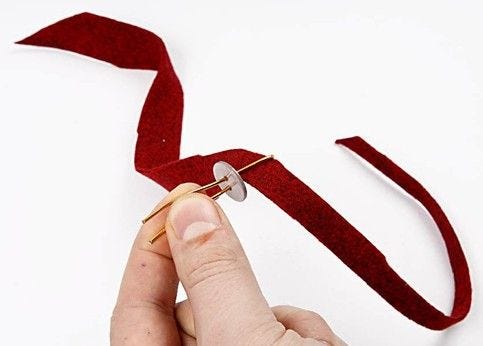 Take one of the strips and pull it through a “brad” as shown.
Take one of the strips and pull it through a “brad” as shown.Step 21. 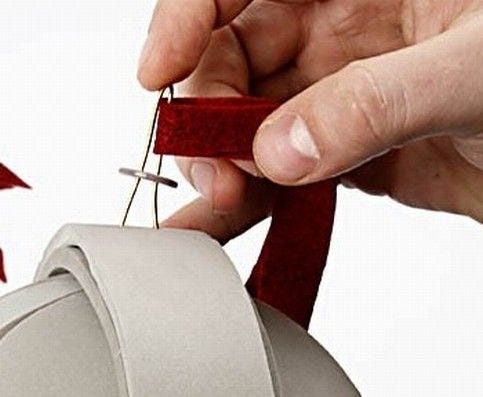 Then attach it onto the top of the helmet.
Then attach it onto the top of the helmet.Step 22. 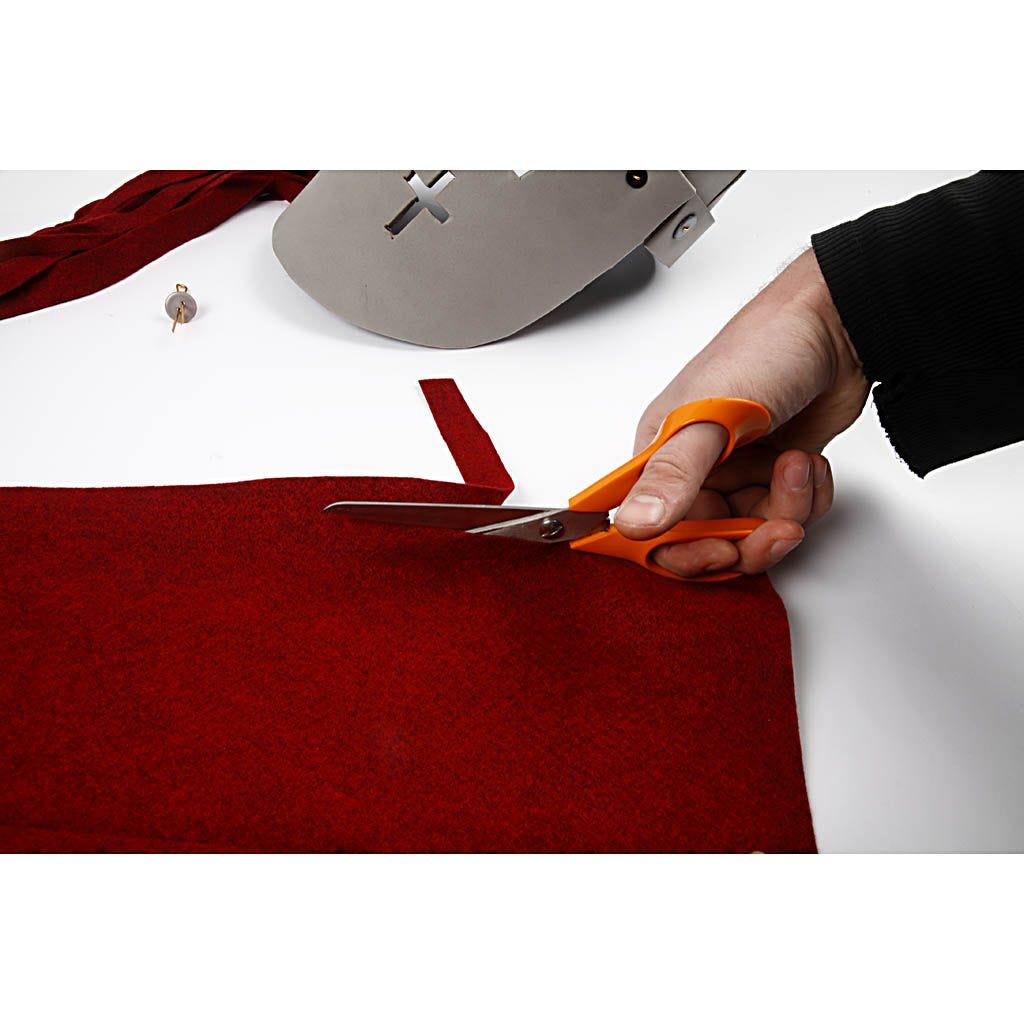 -
-
-Step 23. .jpg) Now tie on the remaining felt ribbons with the fitted ribbon.
Now tie on the remaining felt ribbons with the fitted ribbon.
Now tie on the remaining felt ribbons with the fitted ribbon.Step 24. 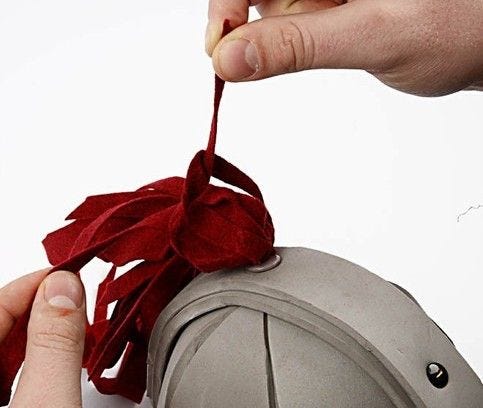 -
-
-Step 25. 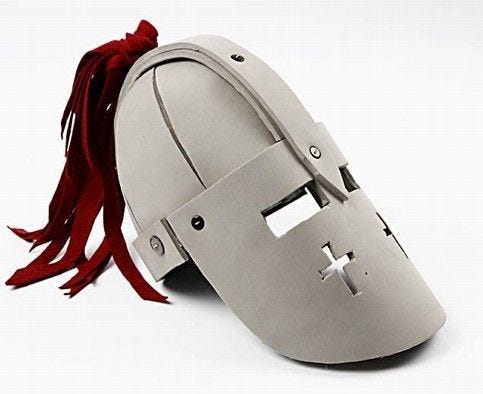 The finished Helmet
The finished HelmetA Variant of the Helmet 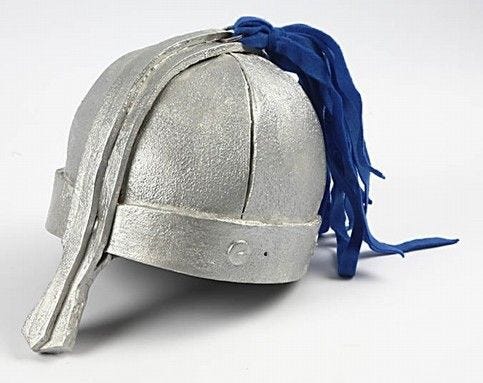 This variant is made without visor and only with a nose protector and painted with Plus Color Craft Paint.
The helmet has been painted in two stages; first with a base coat and then with a foam stamp to give texture.
This variant is made without visor and only with a nose protector and painted with Plus Color Craft Paint.
The helmet has been painted in two stages; first with a base coat and then with a foam stamp to give texture.
This variant is made without visor and only with a nose protector and painted with Plus Color Craft Paint.
The helmet has been painted in two stages; first with a base coat and then with a foam stamp to give texture.Template  -
-
-También vete a explorar
