Ideas creativas
How to hand model using the pinch pottery technique with self-hardening clay and decorating with spatter paint
#v15889
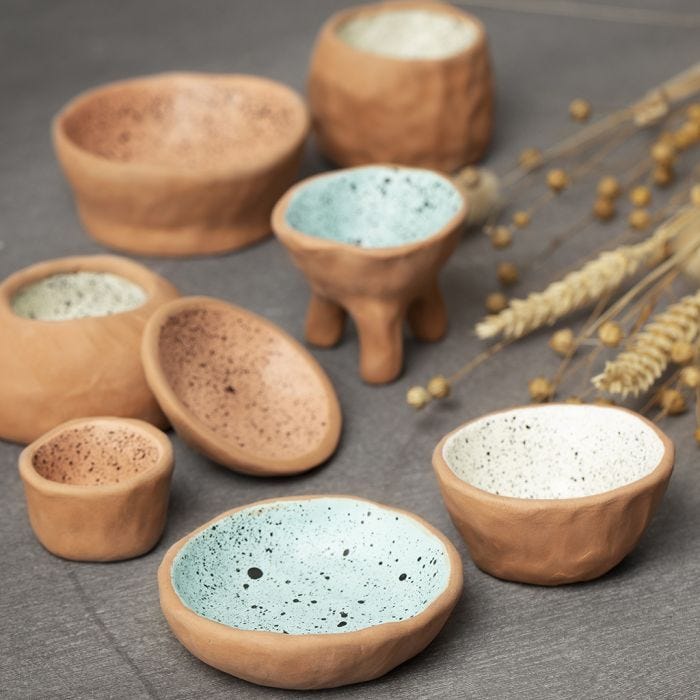
Learn how to hand model with self-hardening clay using the pinch pottery technique. This technique can be used to make trays, bowls and vases with and without legs. Leave the finished items to dry for 24-48 hours prior to painting with craft paint and spatter technique.
#v15889
Cómo hacerlo

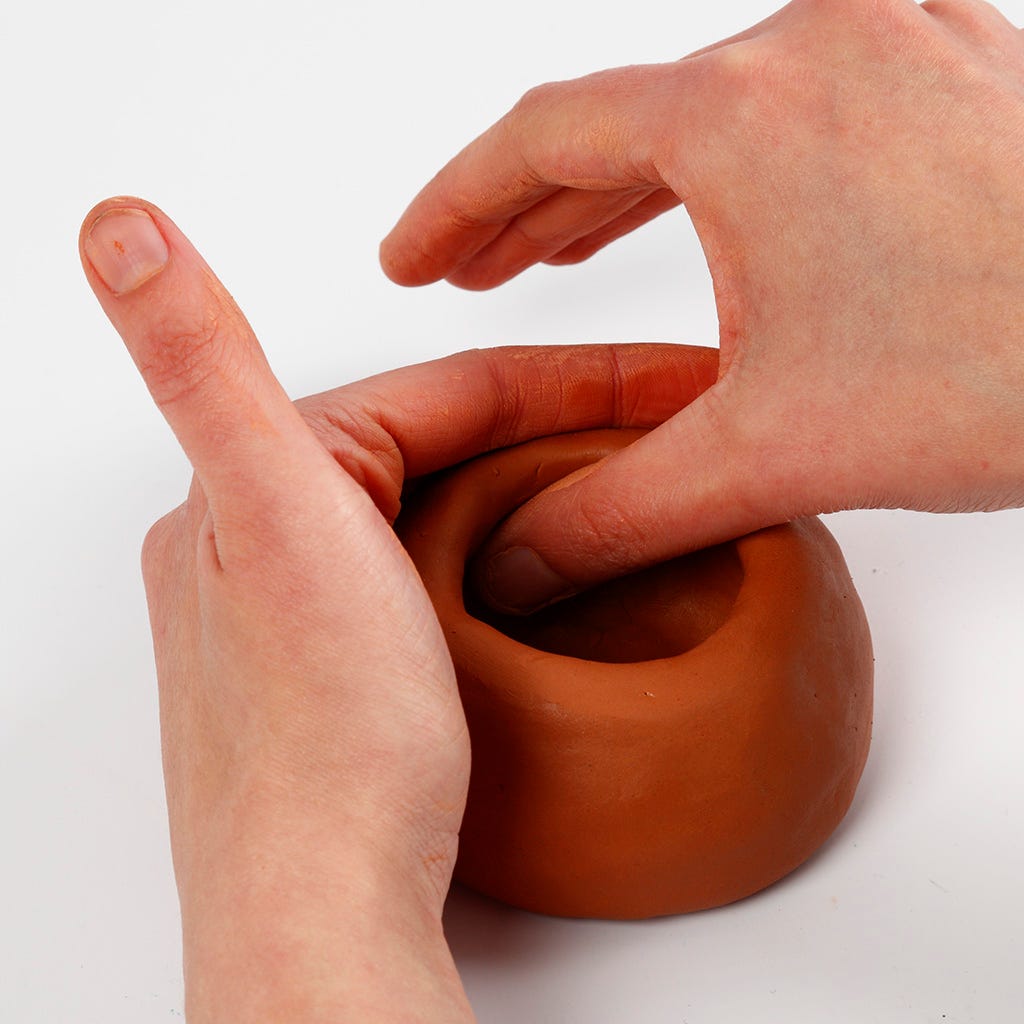
1 Soften the clay by kneading it and then roll it into a ball.
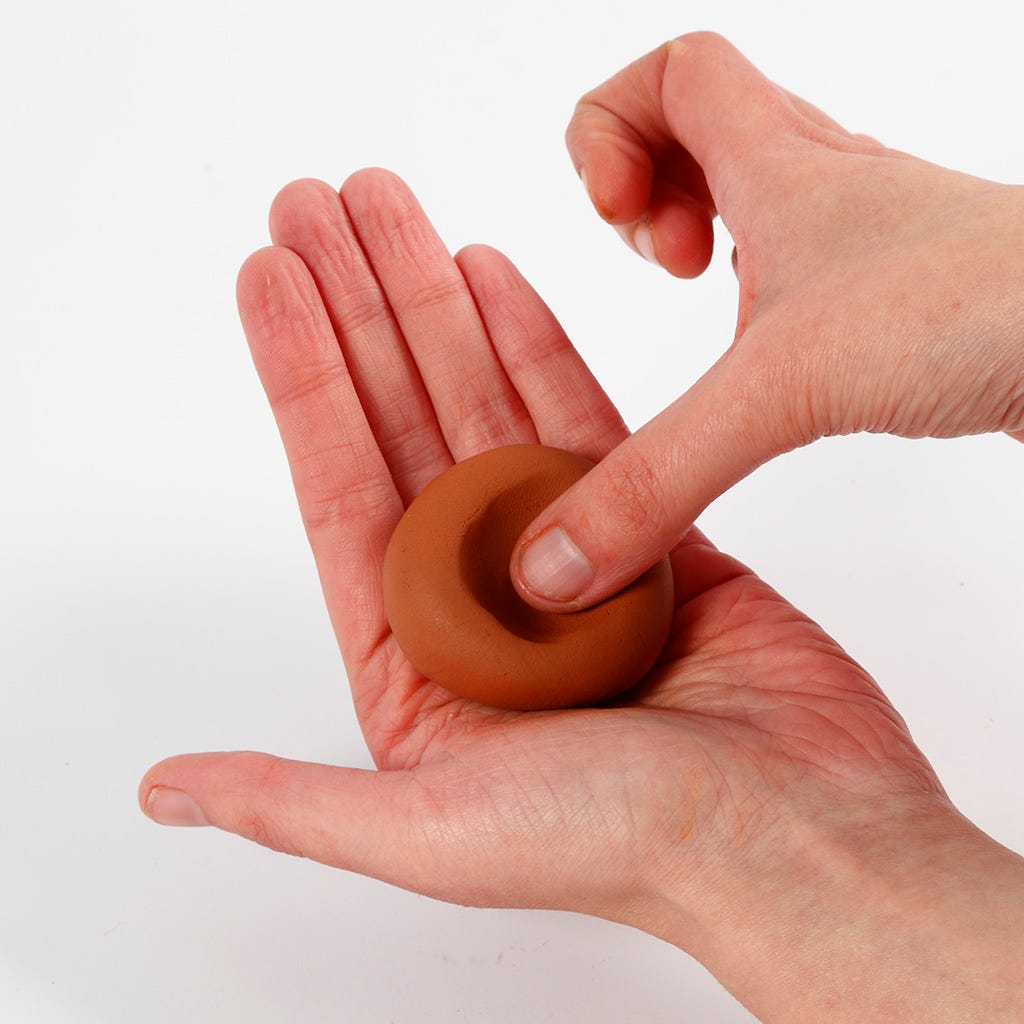
2 Make a hole in the ball by pushing your thumb into the middle of the clay ball, keeping 2-3 fingers on the outside of the ball.
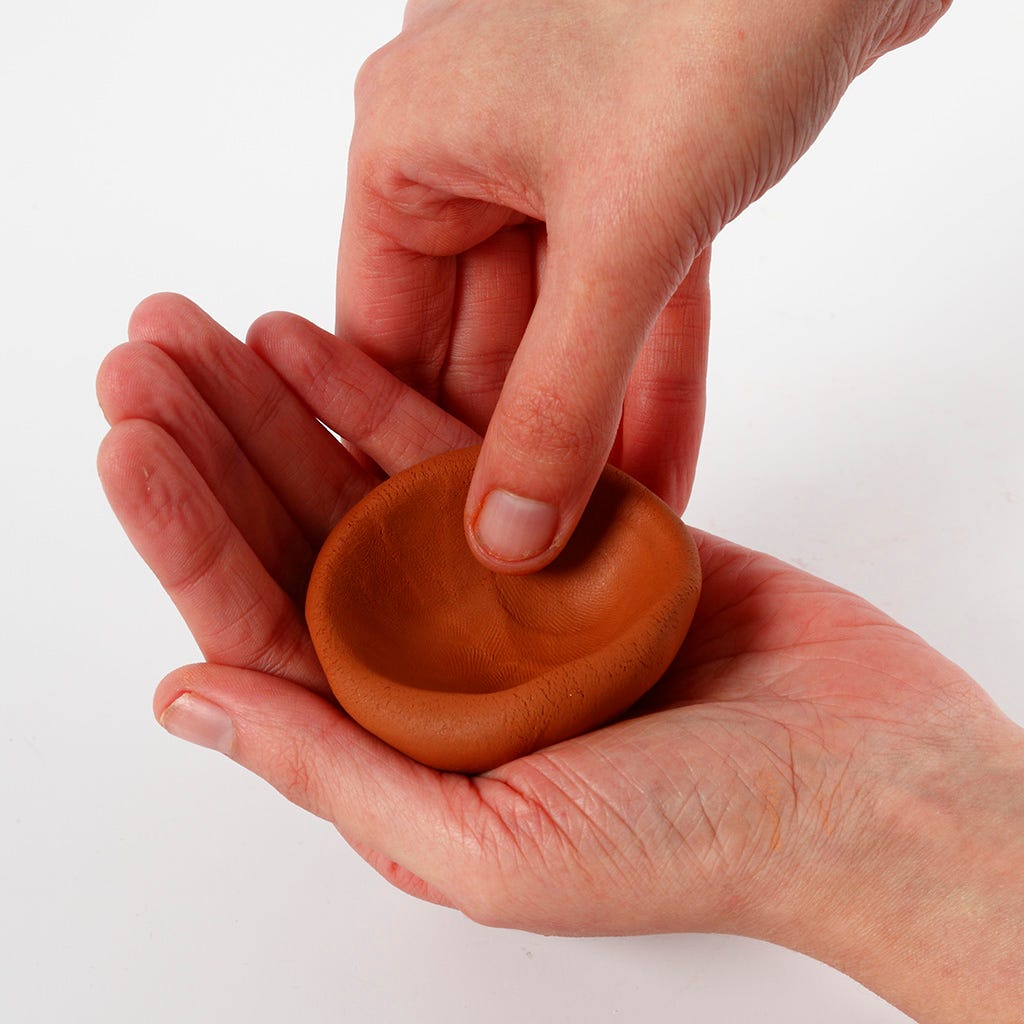
3 Thin the walls evenly by pinching with your thumb on the inside and 2-3 fingers on the outside.
4 Smooth the clay with a bit of water on your fingers.
5 If you wish you may pinch the edge of the bowl higher for a deeper bowl.
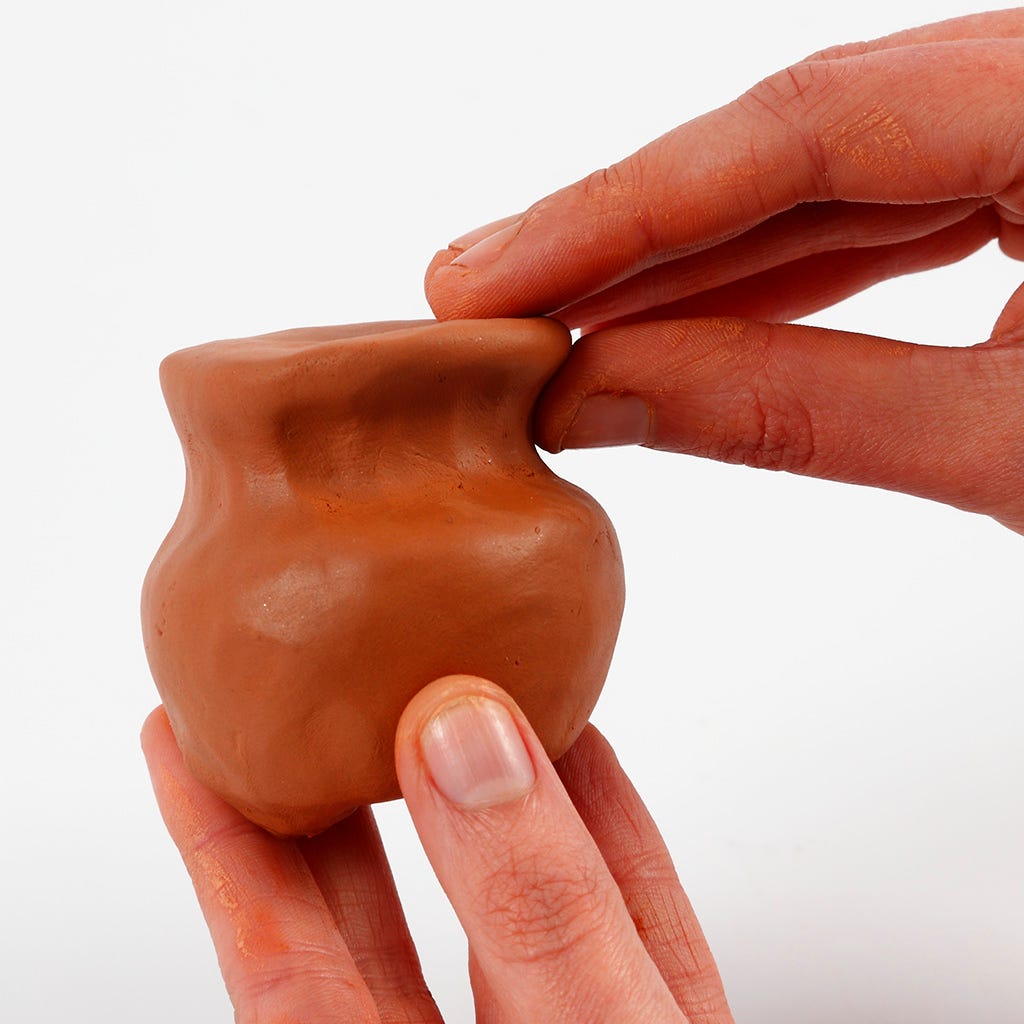
6 Make a vase by following steps 1-3. Make the edge higher and finish by pinching the edge slightly outwards.
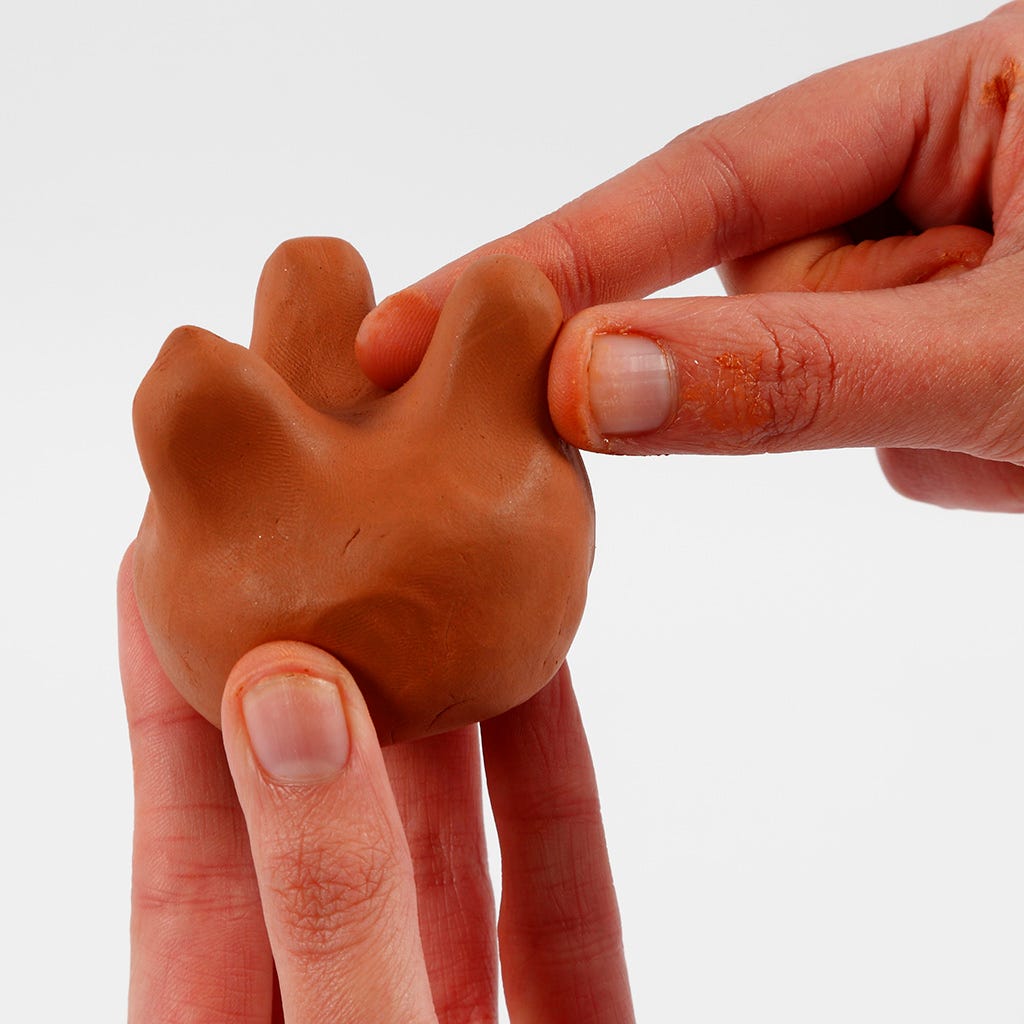
7 If you make steps 1-3 with a thick base, then you will be able to add small legs onto the bottom using your thumb and your index finger to pinch the clay.
A tip: If cracks appear in the pottery once dry, you can repair these by mixing a small amount of clay with a bit of water for a creamy consistency. Fill the crack with the mixture, preferably with a brush. Leave to dry.
The repaired area can be sanded smooth with a sanding sponge or with fine sandpaper.
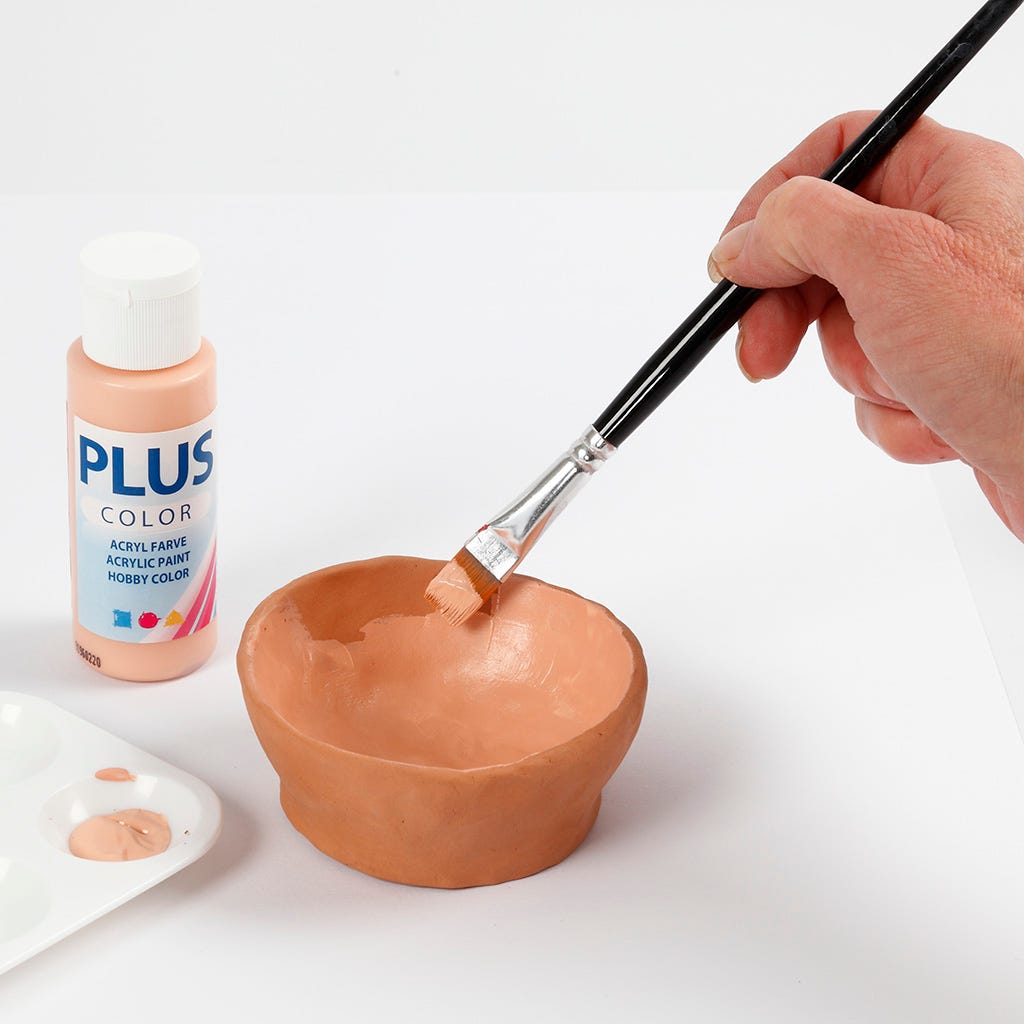
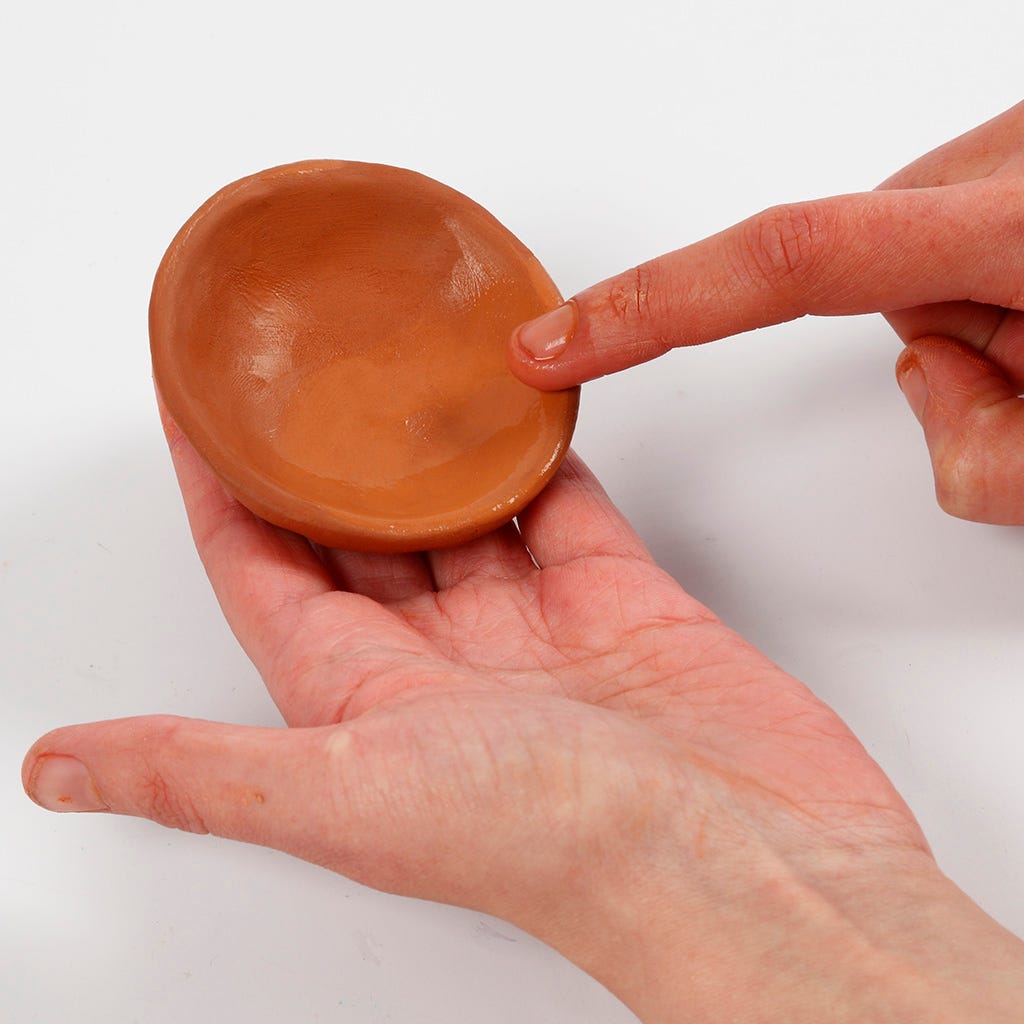
8 Paint the inside of the bowls with Plus Color craft paint. Leave the edge and the outside of the bowl unpainted.

9 Cut a hole in a piece of card for masking. Important: The hole must be smaller than the opening of the clay item, thus avoiding spattering paint onto the rim. You will be able to move the piece of card around slightly when spattering paint, making sure to spatter only onto your chosen areas. Remember to cover the rim at all times.
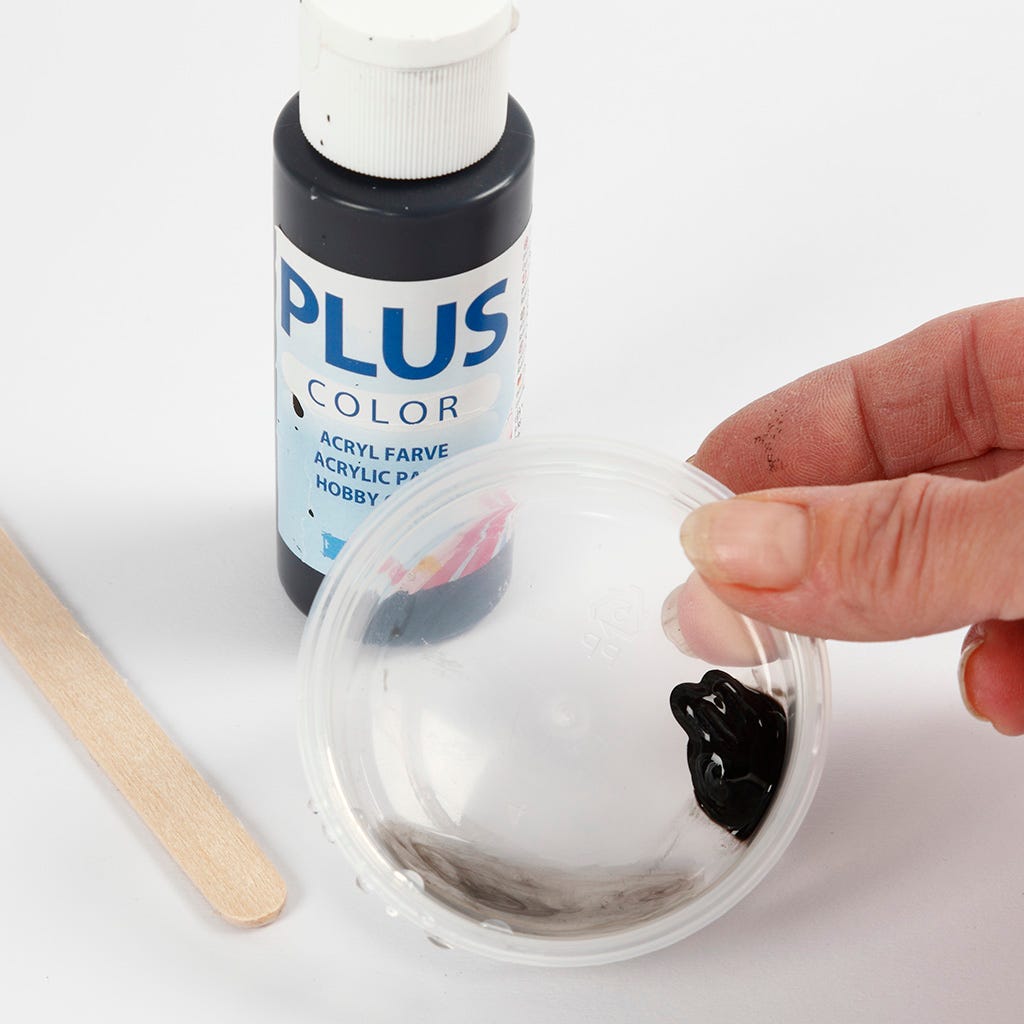
10 Mix a small blob of Plus Color craft paint (approx. 1/4 tsp.) with a small amount of water (approx. 1/2 tsp.).
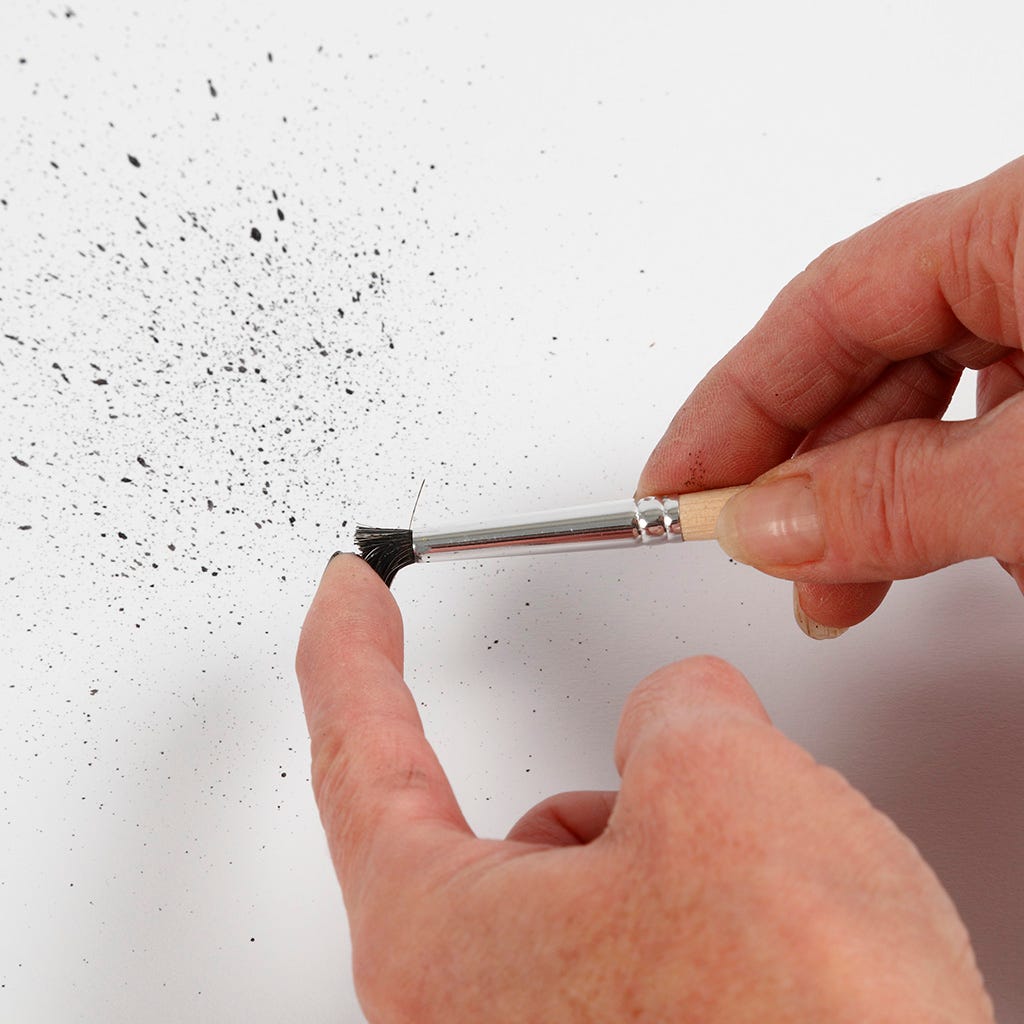
11 Use a piece of card to test that the mixture is the right consistency. Dab a foam stencil brush or a toothbrush into the mixture. Use your index finger to tap off the paint. The mixture should be easy to spatter.
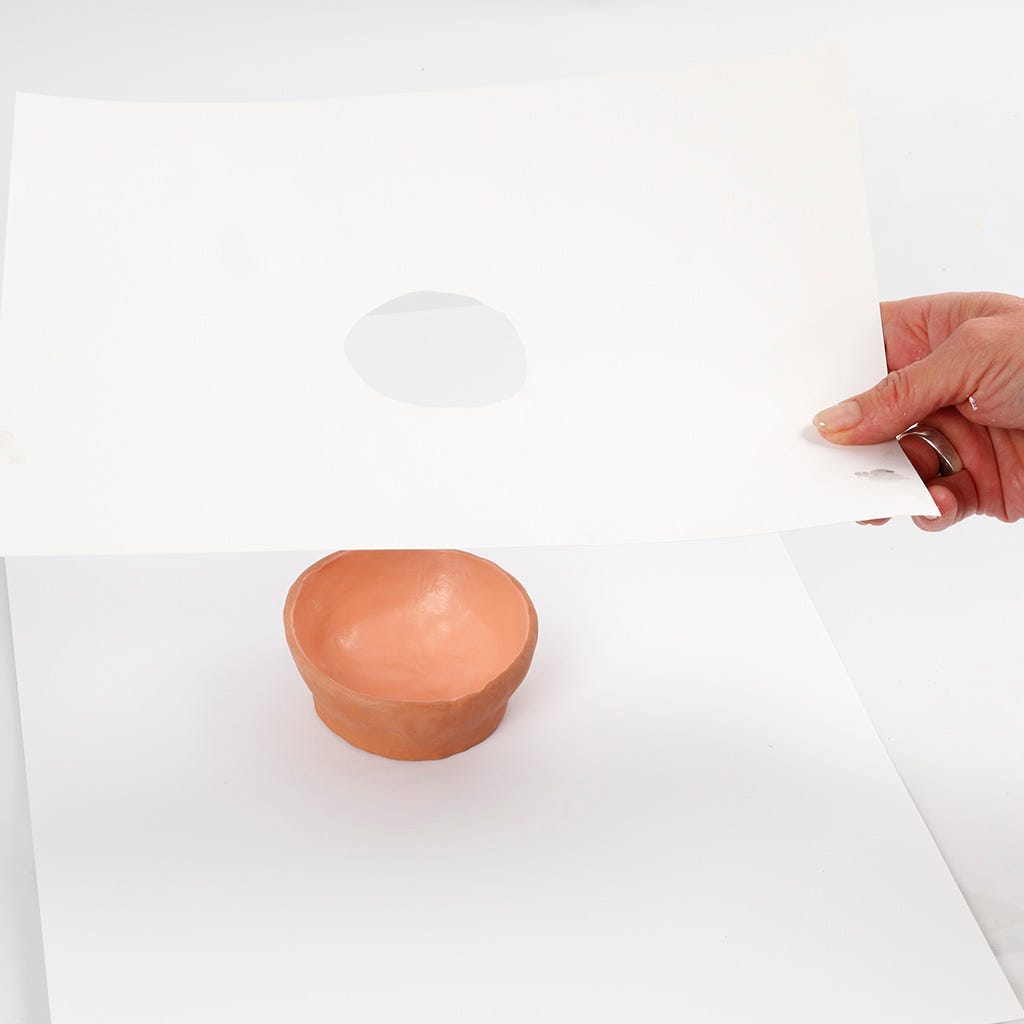
12 Place the piece of masking card over the clay item.
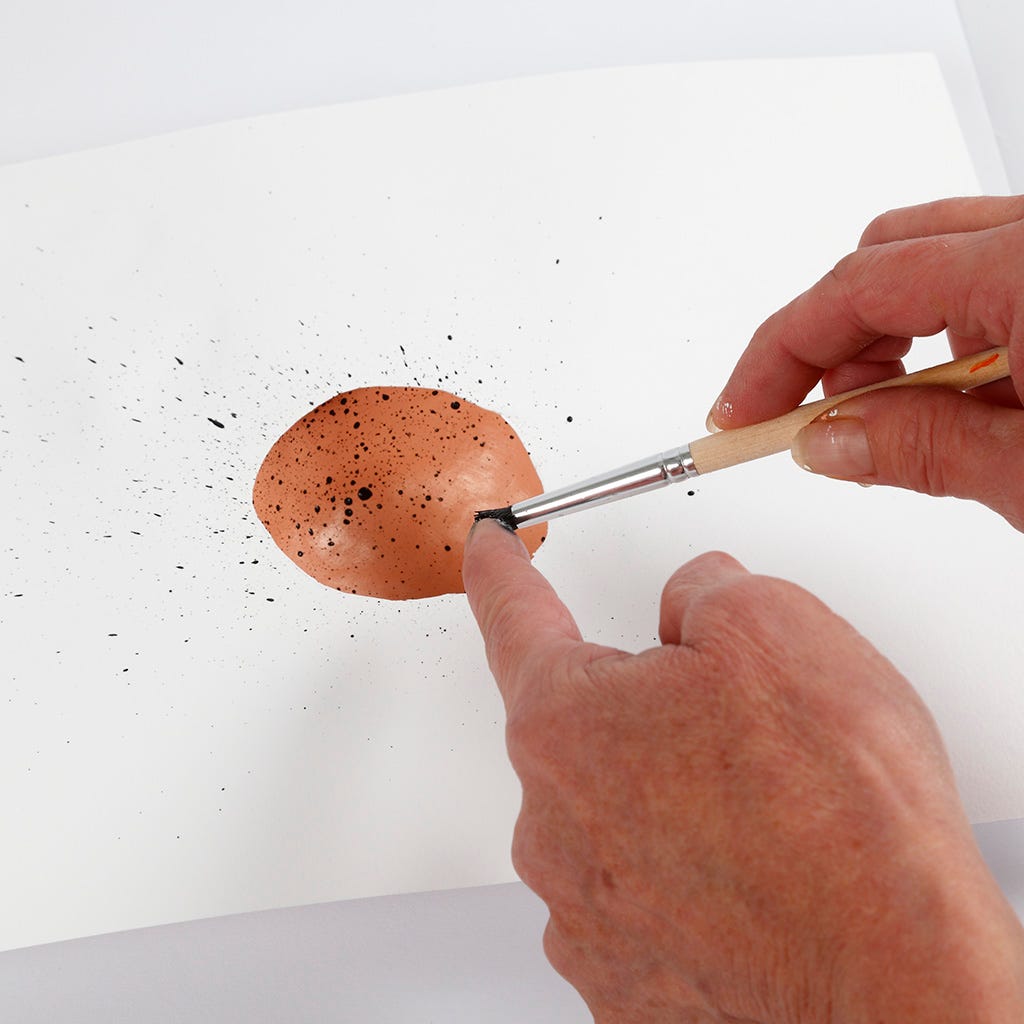
13 Now spatter the paint.
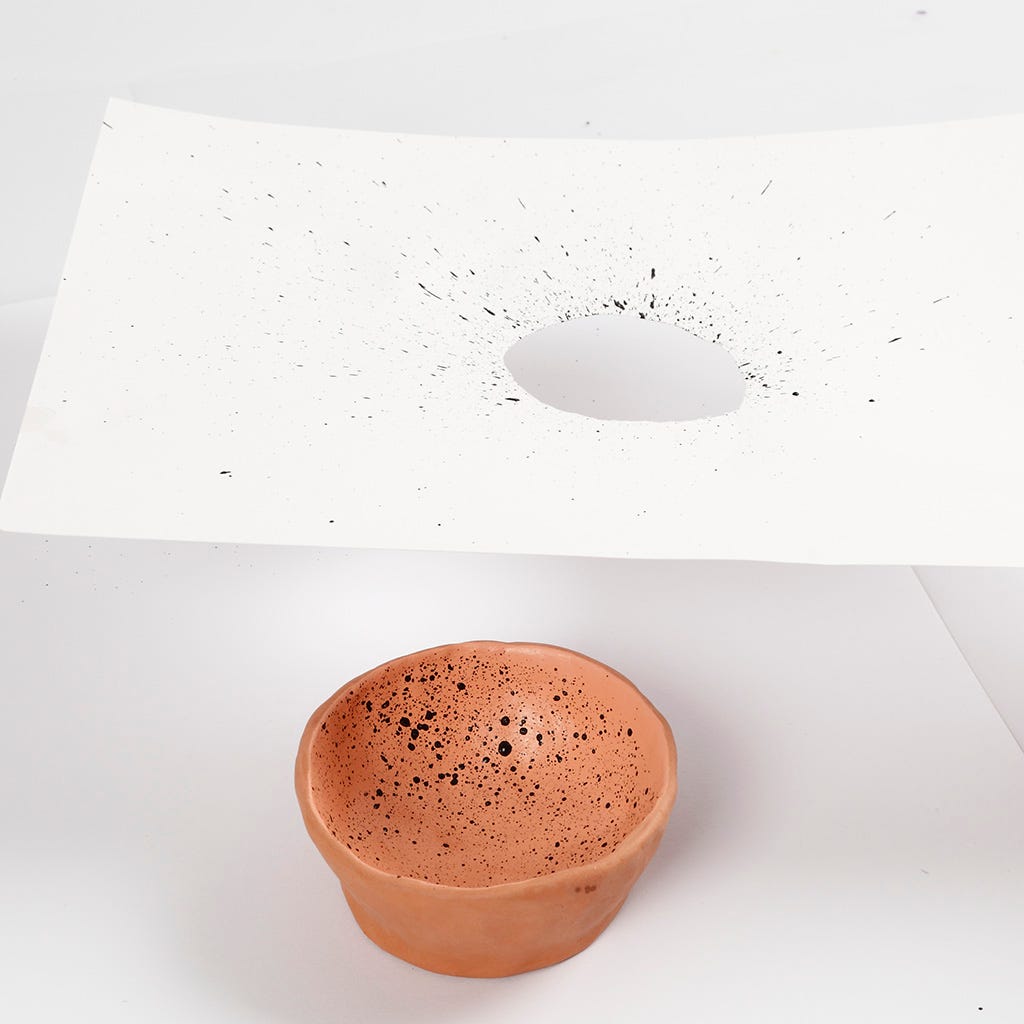
14 Remove the masking card to check if the result is satisfactory – or repeat the process.
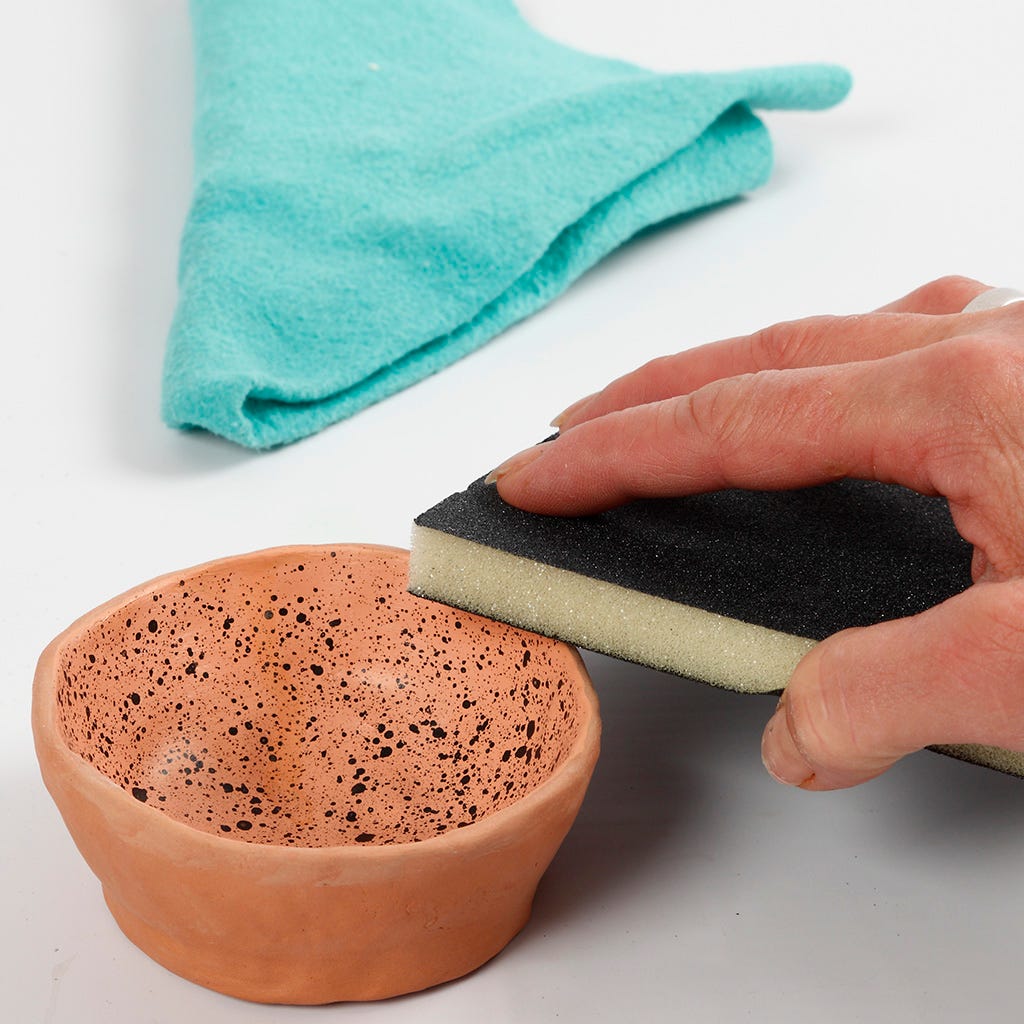
15 You may remove spatters from unwanted areas with a damp cloth before the paint dries completely. Alternatively sand it off with a sanding sponge.
También vete a explorar
Otros también han mirado
{{ getVariationsCountLabel() }}
{{ getName() }}
{{ getDescription() }}
#{{ getSku() }}
hacer una idea a partir de {{ getPriceFormatted() }}